I have finally decided to move our internet subscription up from 1Gbps to 10Gbps. While 1G is already more than sufficient for home use, speed is not all there is. Beyond just raw speed, our old setup was held back by the overhead of PPPoE and the debatable limitation it brings when paired with a FreeBSD-based router OS like OPNsense. The new connection uses IPoE (IP over Ethernet) which doesn’t have the same hiccups the former is known to have.
Second, the old subscription only had IPv4. Don’t get me wrong, IPv4 isn’t a bad thing. In fact, a good majority of the internet still runs on IPv4. But recently, I’ve gained interest in exploring the capabilities and other features that come with IPv6. More on this later, but the main trigger point for this is because IPv6 is already widely used in Japan. If I’m not mistaken, IPv6 adoption has been enforced by the Japan Ministry of Communications for some time now.
Third, since the beginning of last year, I’ve taken on a new role focused on optimizing customer experience performance, where speed is one of the main concerns. To better support this and overcome the limitations of my current toolset, having a speed test server (with multi-gigabit bandwidth) that I have full control of is a fundamental first step!
Hardware
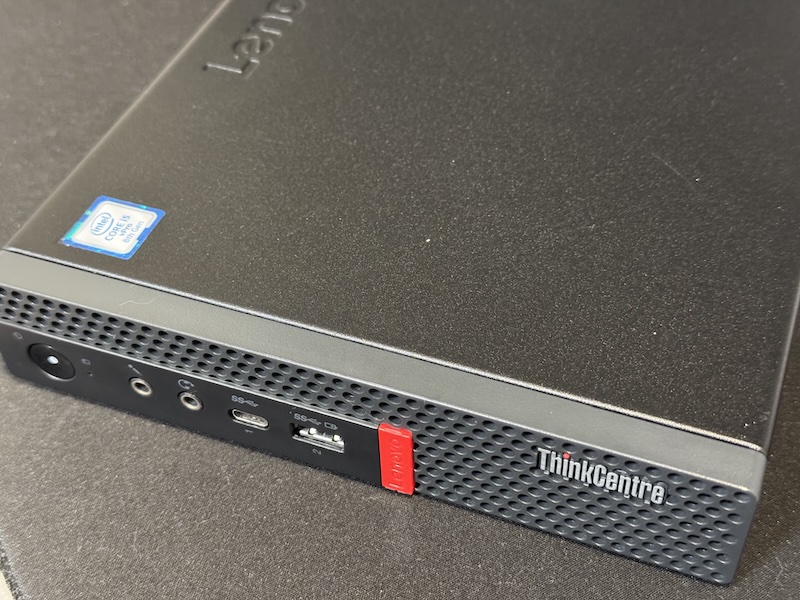
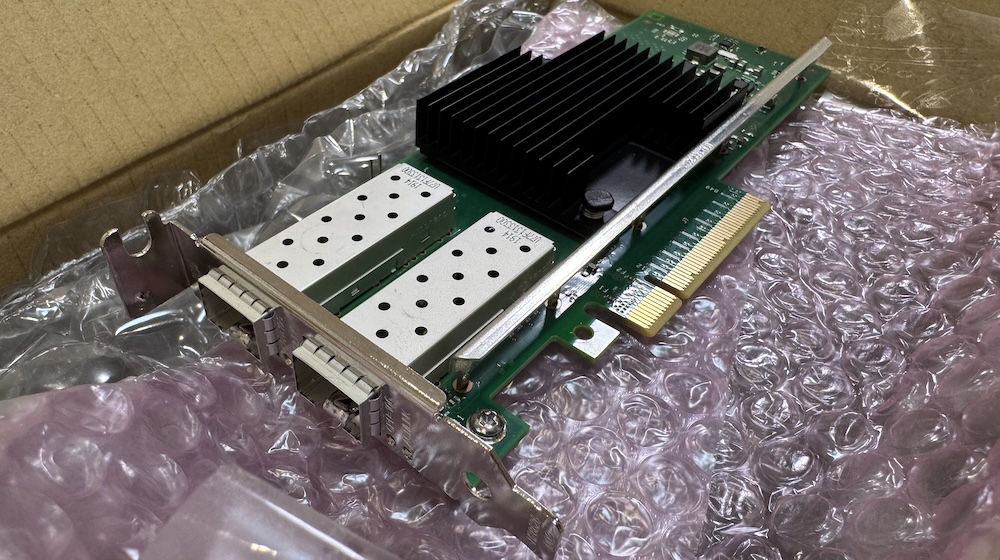
Certain Lenovo Tiny PCs are popular machines for having a PCIe slot that can be fitted with 10G NICs, so that’s what I went with. I was able to get a secondhand one with an Intel i5-8500T 6C CPU. This should be more than enough for my needs, even if I wanted to host other services on this machine. As for the NIC, I had the option of going with Mellanox or Intel ones. To be more specific, I was choosing between a Mellanox ConnectX-4 and an Intel X710-DA2. Mellanox seems to be more popular in terms of compatibility and stability, but it’s also known to have elevated power consumption since it’s not able to achieve higher C-states even when idle. The X710-DA2, on the other hand, was known to have compatibility issues, especially when using the OEM-branded ones. I went with Intel to have peace of mind knowing that I tried my best to save electricity costs (as if all the other machines in the homelab justify all the power they require!).
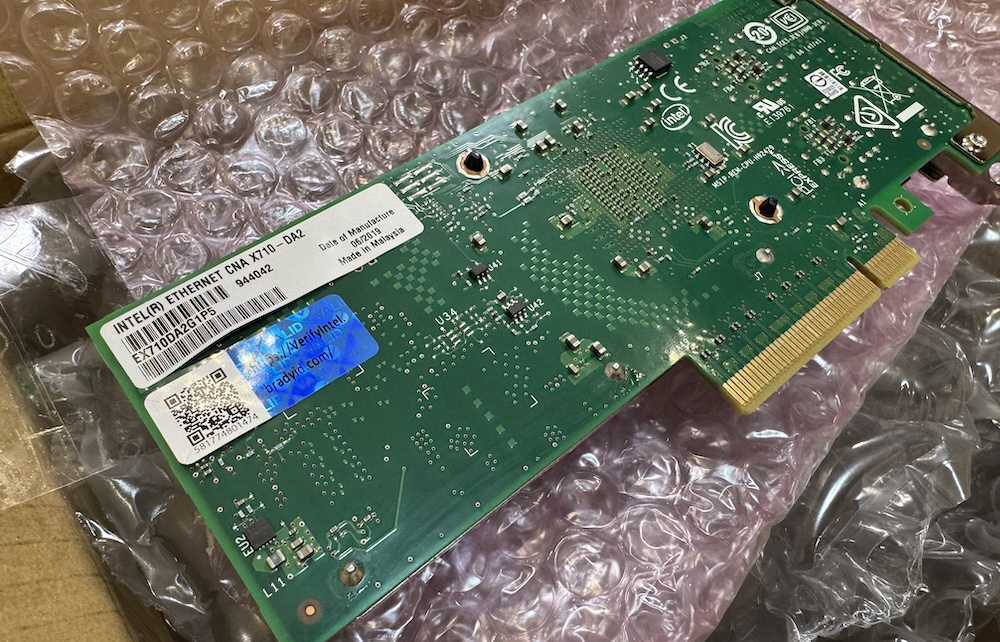
Unfortunately, I assumed the compatibility issue was something generic and could easily be fixed by cross-flashing the original Intel firmware. While this might have worked for others, this isn’t the case when specifically using a Dell-branded X710 NIC with a Lenovo M920q Tiny PC. So, if anyone intends to follow this route, take note! I learned this the hard way because I purchased a Dell-branded one and went through the whole cross-flashing process only to find out that my machine will only boot up successfully if it’s coming from an unplugged state. Yup, that means it will only boot up after unplugging and plugging the power cable. Anyway, I ended up purchasing an Intel-branded one and just flashed it with the latest firmware. For anyone interested, the articles I followed are also shared at the end of this post!
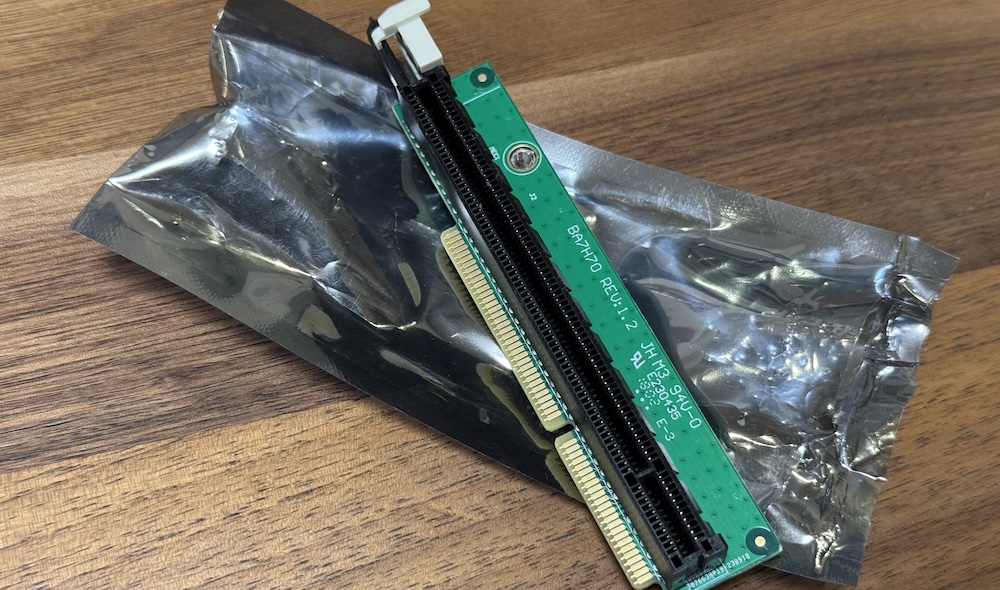
Lenovo M920q Tiny PCs require a PCIe riser for plugging in your cards. This can easily be bought for about ¥2000~3000 online. There are different part numbers in terms of the supported bus speed, so I had to ensure I got the one with P/N: 01AJ940, which supports x8.
As for the 10G switch, for the time being, I got a 4x2.5 + 2x10G switch from Horaco (AliExpress). I already have an 8x2.5G switch from the same brand and it’s been rock stable. There was no really good reason for me to try out another brand. If there was one thing where you have to manage your risk, it’s when purchasing networking equipment from AliExpress!
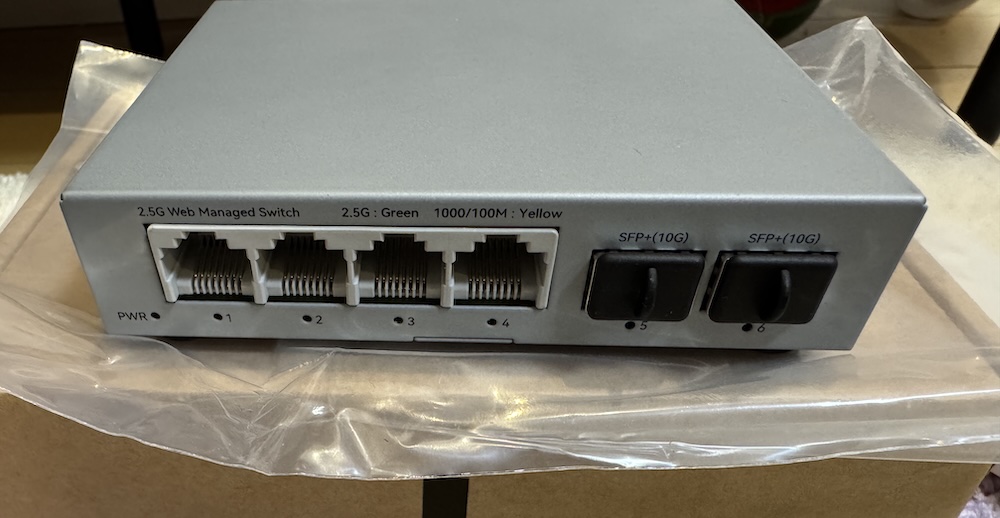
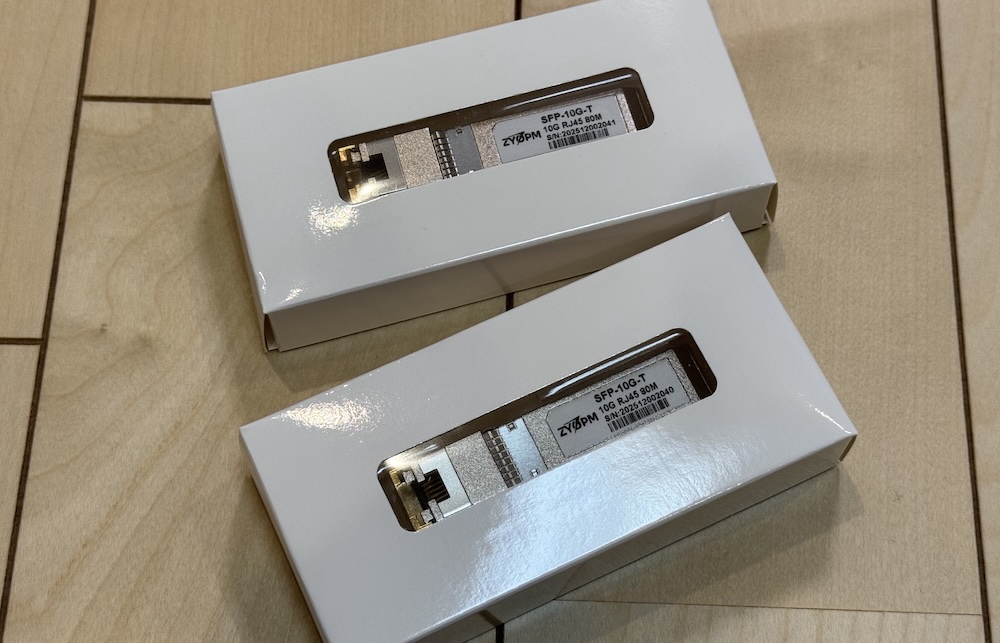
10G SFP+ to copper transceivers are known to run hot. And because I keep my networking equipment in an unventilated closet, I had to shed an extra couple of bucks for the premium ones—the version that supports up to 80m of copper. For the transceivers, I got them from a brand called ZYOPM.
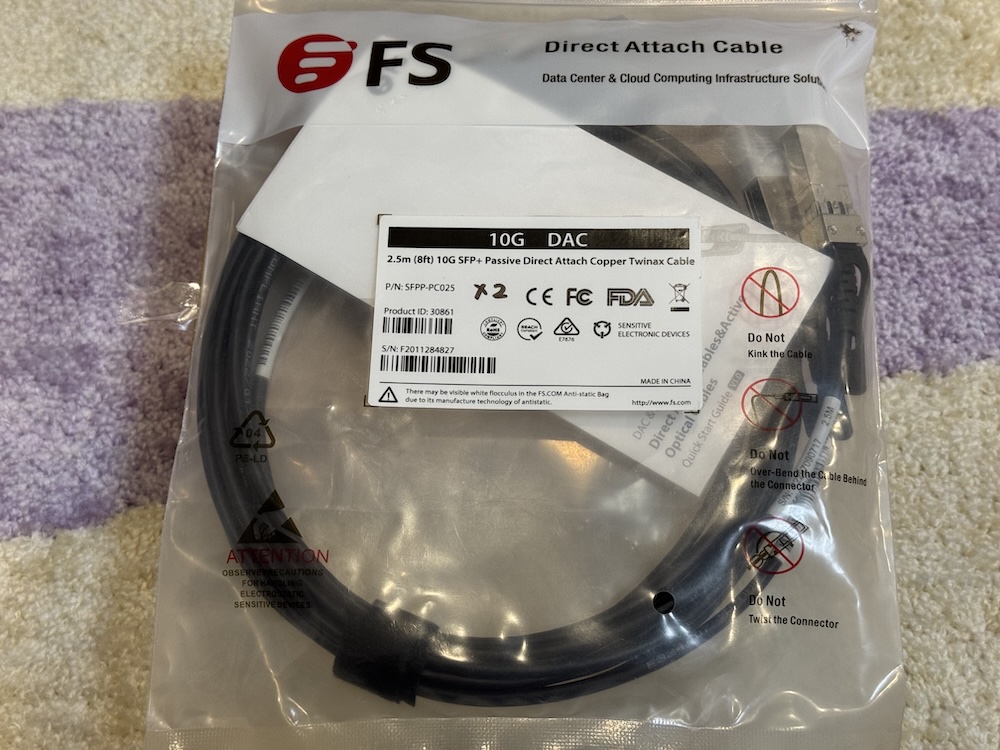
Managing the temperature inside an enclosed space is a priority, so I had to make sure the temps are at a minimum whenever possible. For the upstream connection of my switch to the router, I used a DAC cable. I’ve never used one before and actually thought of using optical transceivers in the beginning.
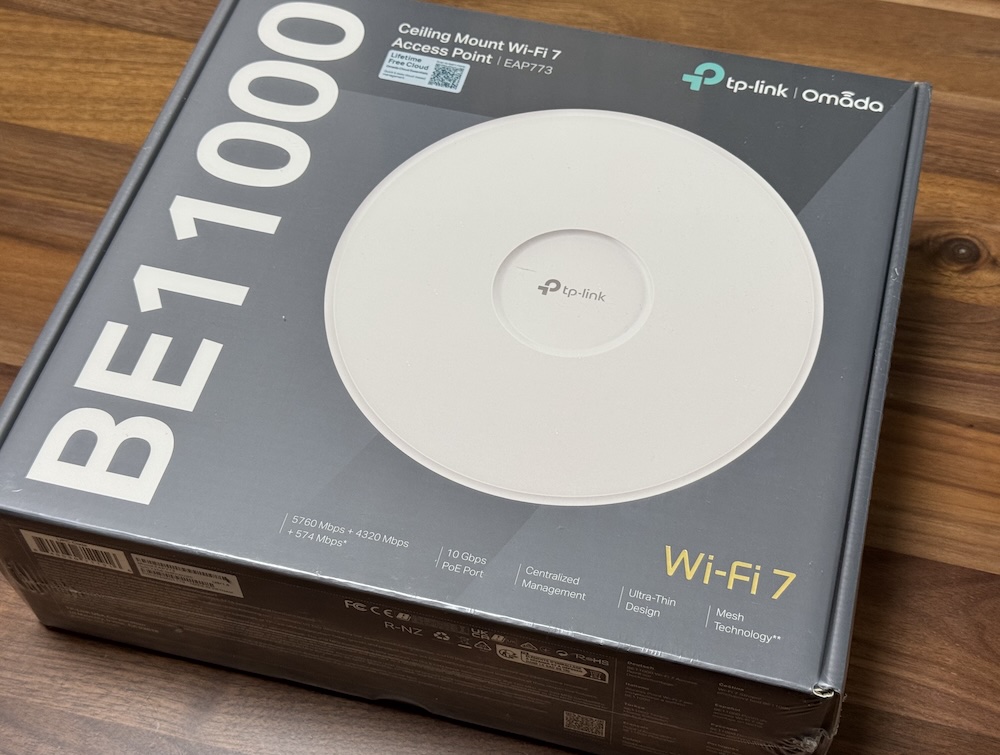
On to the Wireless AP, I also upgraded from my not-so-old TP-Link EAP610 to an EAP773. The former only supported Wi-Fi 6 over 2.4/5 GHz bands with 1G upstream. For “future-proofing,” at least for the next few years, and to make use of the upgraded upstream, I needed something which at least supported Wi-Fi 6E over 6 GHz.
I also had to get a PoE++ 90W injector since the new switch didn’t support PoE+.
Software
There are mixed opinions on whether you should virtualize your router or not. But if you live somewhere where space is a luxury, then you already have the best reason to go with virtualization (but regardless of that, I just really like complicating things, lol). So of course, we go back to our good old friend, Proxmox. The last time I had to spin up a new Proxmox machine was about 2 years ago when I started using CEPH as my default backend storage. A lot of good things must have been added within these 2 years, but I just really needed an easily managed KVM host. No one can beat Proxmox on that.
As for the router itself, I made the big switch from OPNsense to OpenWRT. And I couldn’t be happier. I’ve had OPNsense for about 3 years now and while I didn’t really complain about anything since it was more of a “set and forget” setup, whenever I had to modify something in the configuration, sometimes it just felt like I had to explore and familiarize myself again. With OpenWRT, the GUI just felt a bit more natural and warm to my eyes. Maybe it’s because of fewer sections or tabs to go through, or, I don’t know, configuration just seemed a little more straightforward this time compared to when I just started with the other.
But in fact, I don’t think I would have bothered checking out OpenWRT if only OPNsense supported MAP-E connections used by my new ISP. There is a way to get it working with OPNsense, but it was more of a workaround than a natively supported feature.
My choice of ISP
The primary factor in choosing the ISP is the monthly cost. The switch to 10G wouldn’t be justifiable if we had to pay 50% more than our old subscription. Second would be the option to have a fixed IPv4 address since I host some services for family and friends. Fortunately, I came across a post on Reddit suggesting En Hikari. En Hikari uses NTT FLET’S HIKARI as the backbone provider, so you can be assured of the same quality of connectivity used by most ISPs. At the time of writing, the monthly cost is about JPY 4,917 (tax included) plus an additional JPY 770 for the optional fixed IPv4 address. That’s a total of JPY 5,687, which comes out even cheaper than our current basic 1G subscription at JPY 5,720 (dynamic IPv4 address only).
Preparations
When I got the Intel X710 card, it only had v6.01 installed. I didn’t find a way to upgrade directly from v6.01 to the latest one (v9.56 as of this writing) and had to go through it stepwise. The upgrade path in my case was from 6.01 –> 8.6 –> 9.0 –> 9.10 –> 9.56. All done under Debian (Proxmox).
My Intel card came with unlocked vendor support, so I didn’t have to run the unlocker script. I guess this is only applicable to the OEM versions.
I actually ran into some errors initially that prevented the second Ethernet port from functioning. Honestly, I hit a wall and gave up on it for the night. Then, I’m not sure how, but it just got resolved the following morning after a restart.
After a few more rounds of restarts and going through kernel dmesg logs, I finally decided to go with a fresh install of OpenWRT. For some reason, I couldn’t figure out how to create the VLAN interfaces from the GUI. I ended up with a successful attempt when I tried to do it from the text file configuration. To those who are in the same boat, below is a sample /etc/config/network for configuring VLANs.
config interface 'loopback'
	option device 'lo'
	option proto 'static'
	option ipaddr '127.0.0.1'
	option netmask '255.0.0.0'

config globals 'globals'
	option ula_prefix 'fd00:7808:88c3::/48'
	option packet_steering '1'

config device
	option name 'br-lan'
	option type 'bridge'
	list ports 'eth0'

config interface 'lan'
	option device 'br-lan.1'
	option proto 'static'
	option ipaddr '192.168.0.1'
	option netmask '255.255.255.0'
	option ip6assign '64'
	list dns '192.168.0.1'
	option ip6hint '00'

config interface 'wan'
	option device 'eth1'
	option proto 'dhcp'
	option keepalive '5 10'

config interface 'wan6'
	option device 'eth1'
	option proto 'dhcpv6'
	option reqaddress 'try'
	option reqprefix 'auto'
	option norelease '1'

config bridge-vlan
	option device 'br-lan'
	option vlan '1'
	list ports 'eth0'

config bridge-vlan
	option device 'br-lan'
	option vlan '10'
	list ports 'eth0:t'

config bridge-vlan
	option device 'br-lan'
	option vlan '20'
	list ports 'eth0:t'

config interface 'vlan10'
	option proto 'static'
	option device 'br-lan.10'
	option ipaddr '192.168.10.1'
	option netmask '255.255.255.0'
	list dns '192.168.10.0.1'

config interface 'vlan20'
	option proto 'static'
	option device 'br-lan.20'
	option ipaddr '192.168.20.1'
	option netmask '255.255.255.0'
	list dns '192.168.20.0.1'
/etc/init.d/network restart to apply the config.
For now, I just wanted a stable internet connection and didn’t even bother to think about having SR-IOV, so it’s been decided to just make use of the existing Proxmox Linux bridges for both the WAN and LAN interface.
En Hikari configuration on OpenWRT
References: https://note.com/arunya/n/n7d81e0de9db7 https://www.ficusonline.com/ja/posts/openwrt-v6-plus-map-e
I found these two articles that provide step-by-step instructions to get En Hikari working with v6 plus and the fixed IPv4. The initial steps to have DHCPv6 working are in the first one. In my case, I installed the required packages first:
- luci-proto-ipv6
- map
- ds-lite
- ip-full
As I know Hikari Cross utilizes MAP-E. I am not sure if ds-lite is really required, but I just installed it anyway.
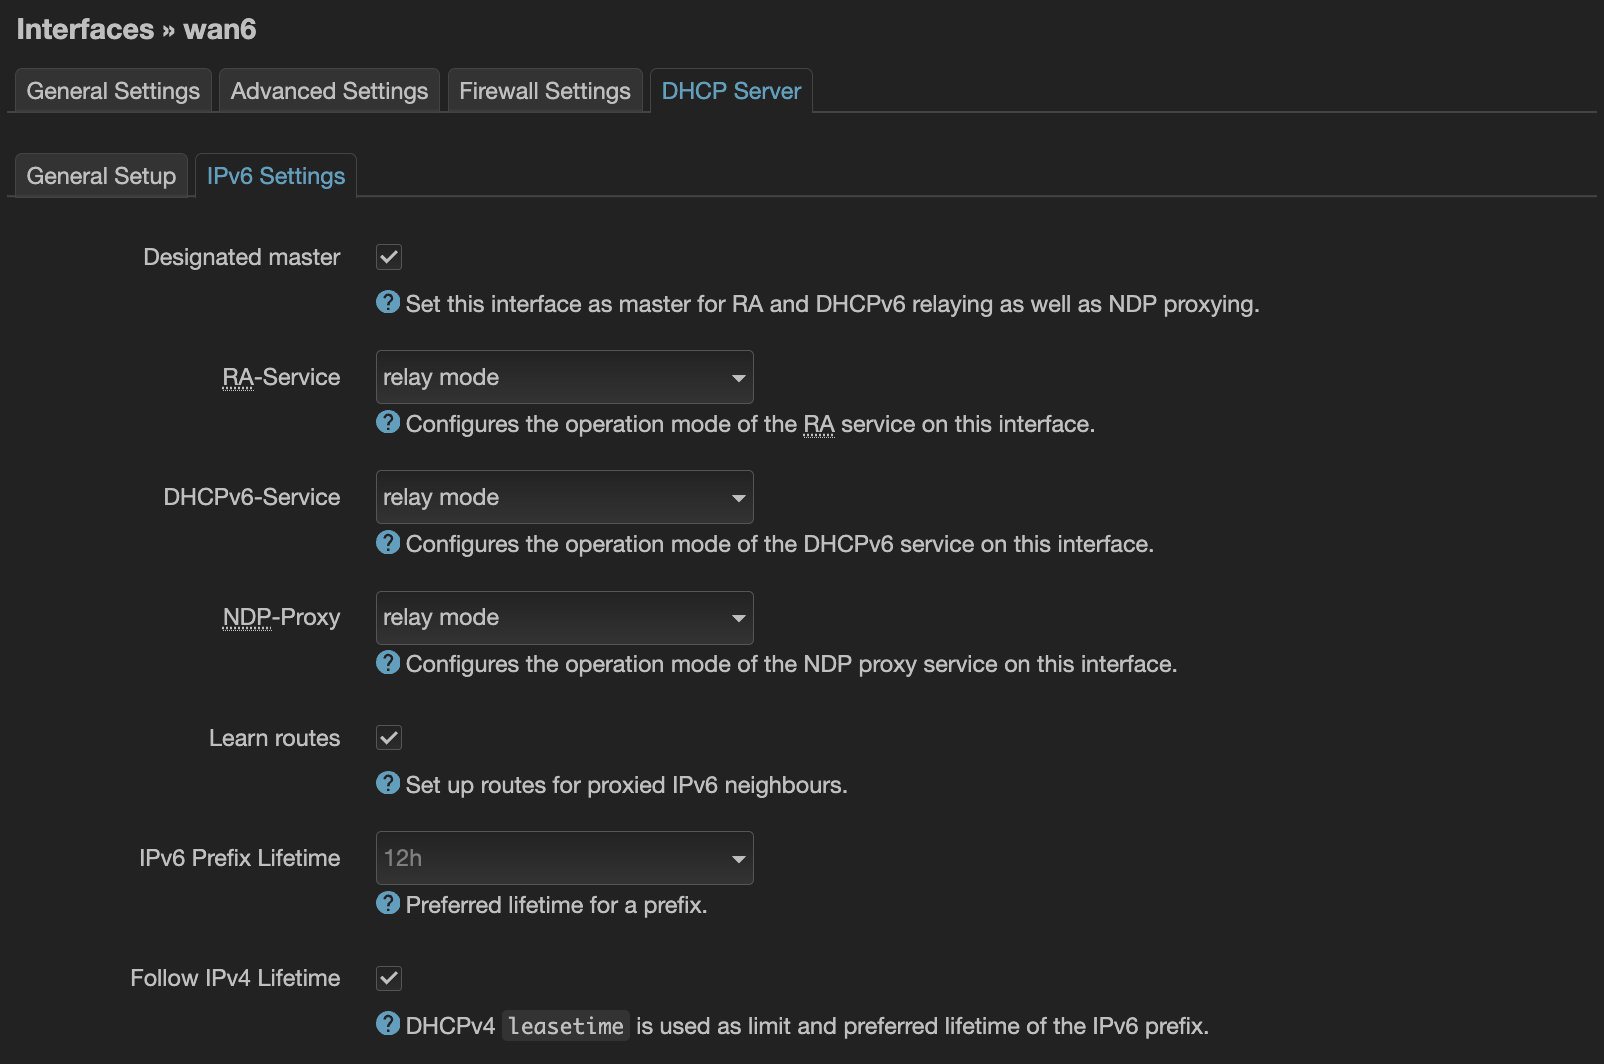
I created a new WAN interface, named it ‘wan6’, and set the protocol to DHCPv6 client. Under DHCP Server > IPv6 Settings, the RA-Service, DHCPv6 Service, and NDP Proxy were all set to disabled. After a few seconds, I was assigned an IPv6 /56 subnet.
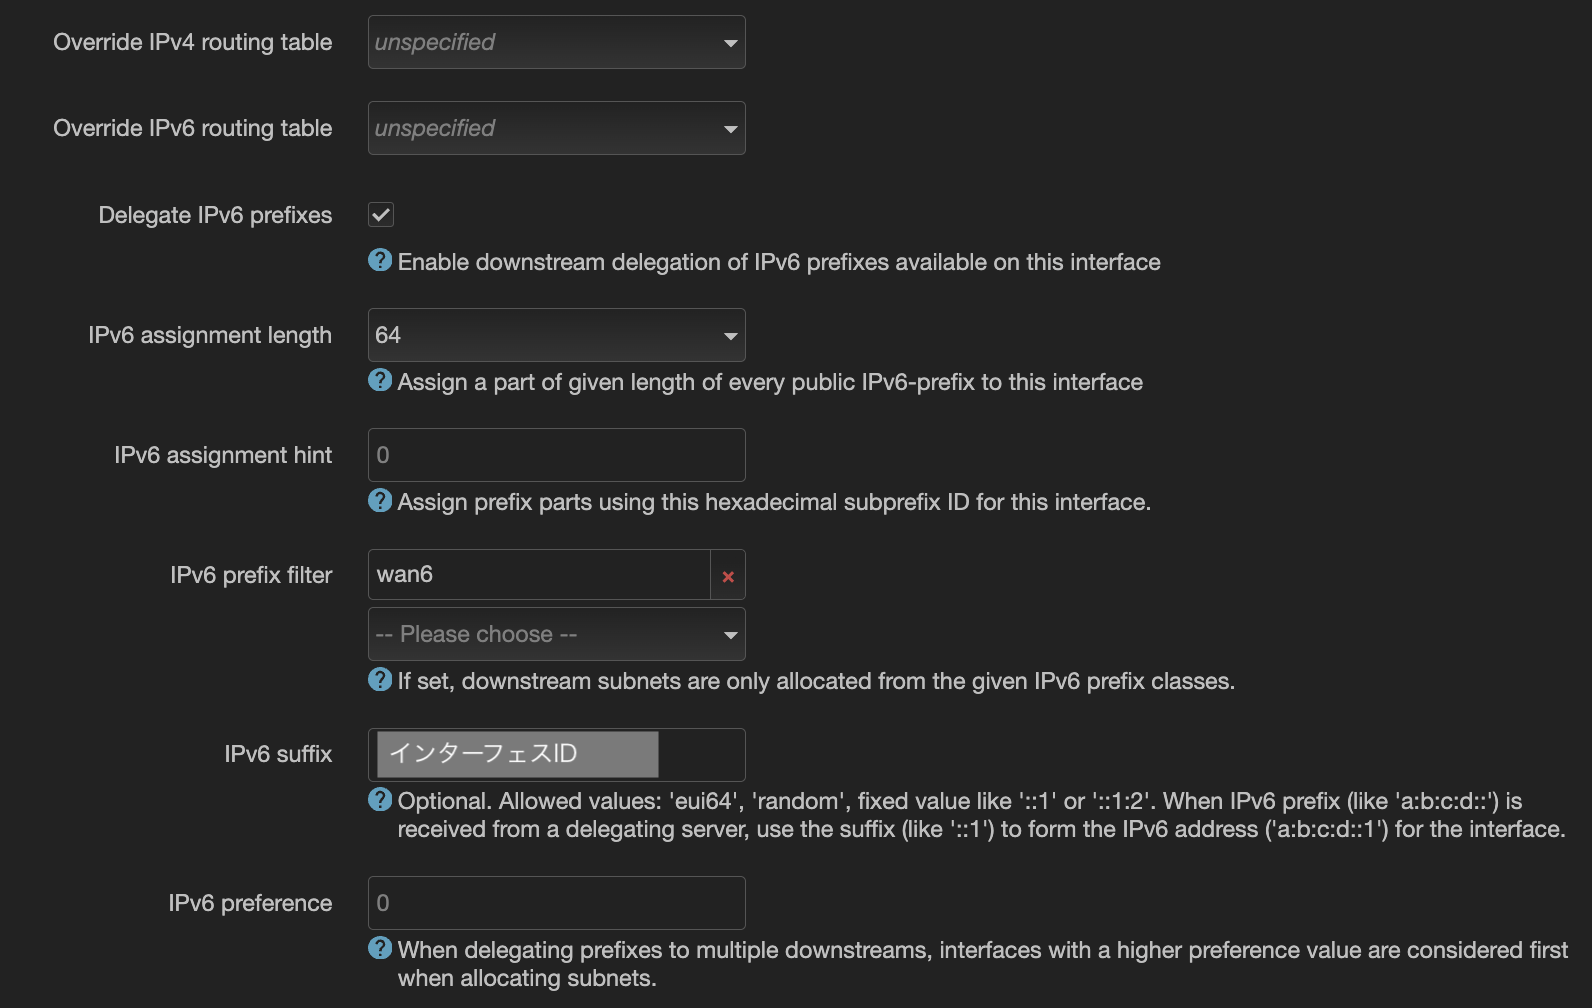
For the clients to connect over IPv6, I had to enable IPv6 under Interfaces > LAN > Advanced Settings. IPv6 assignment length was set to 64 and hint to 00 so my LAN gets assigned the first smaller subnet of the /56 block.
Under LAN > DHCP Server > IPv6 Settings, RA-Service and DHCPv6 Service should be set to server and NDP Proxy to relay. Under IPv6 RA Settings, I made sure SLAAC was enabled. The rest were set to default. After applying the changes, my devices started having an IPv6 address, the majority by SLAAC and a very few through DHCPv6.
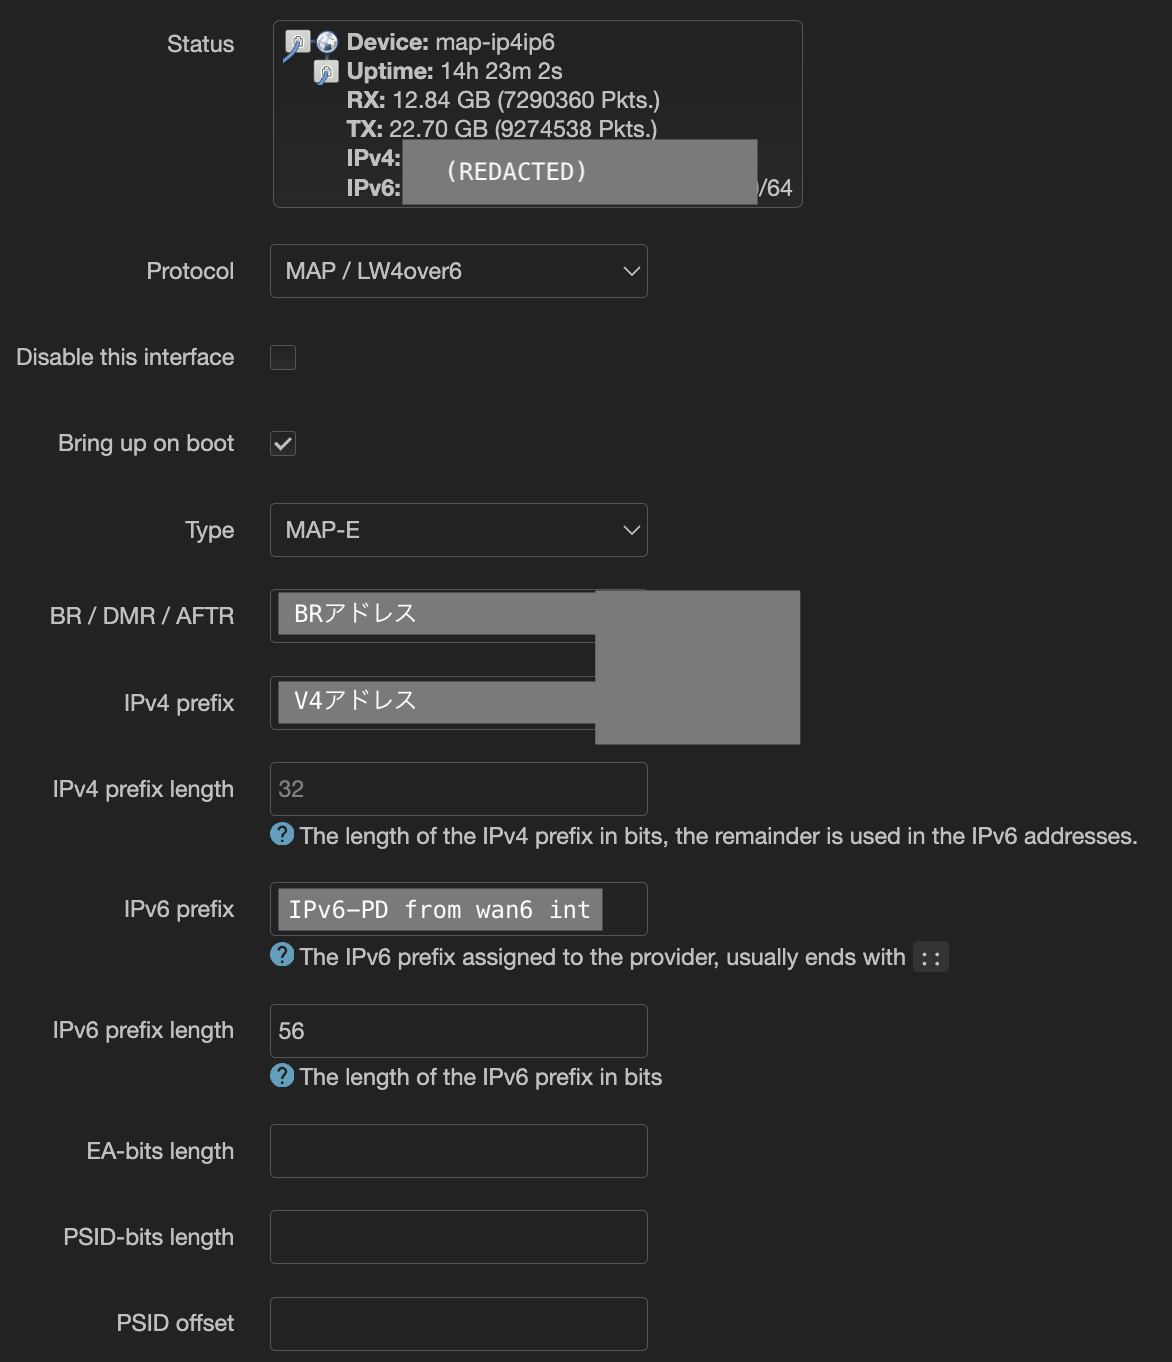
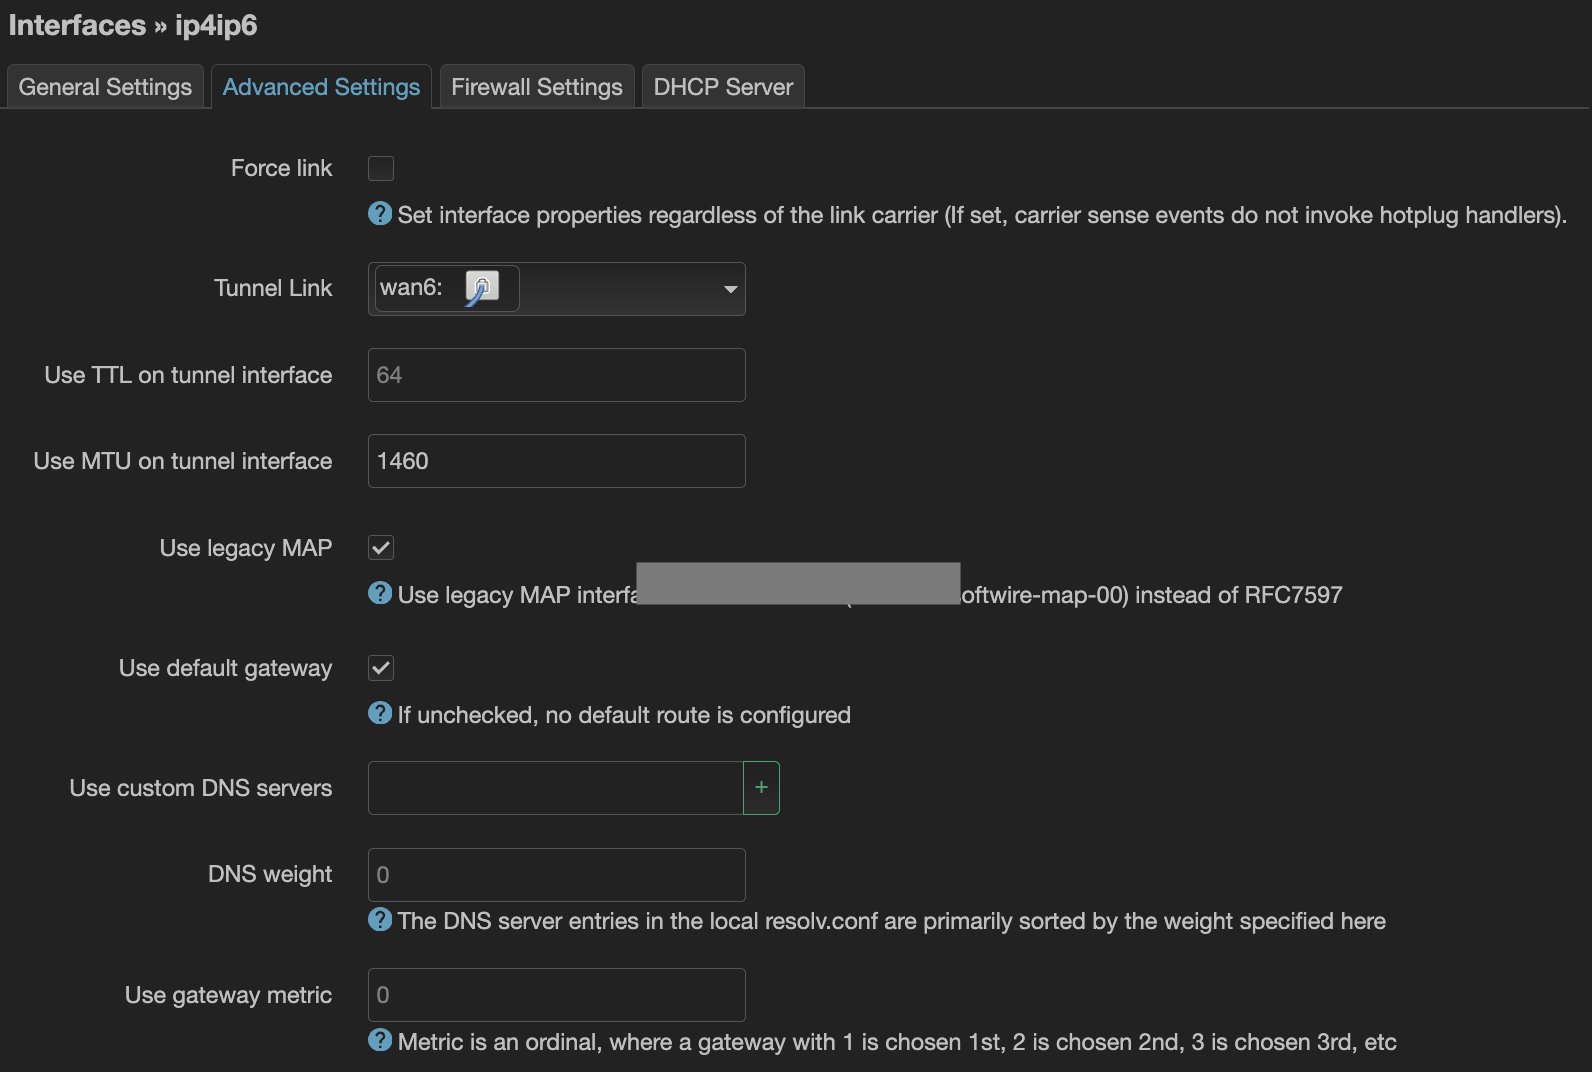
For the IPv4 configuration, I just followed the article. Though I am still sharing my snaps here for future reference:
Info that was provided by the ISP:
- V4アドレス
- インターフェスID
- BRアドレス
- ユーサID
- パスワード
Quick speed test
I don’t have any other equipment (yet, lol) that supports 10G traffic, so I spun up an LXC container on the same PVE hosting OpenWRT and ran a simple iPerf test from there. I selected one of the JP servers from this list maintained by @R0GGER (Big thanks to him!).
The result, DL and UL speed respectively:
The result:
DL SPEED
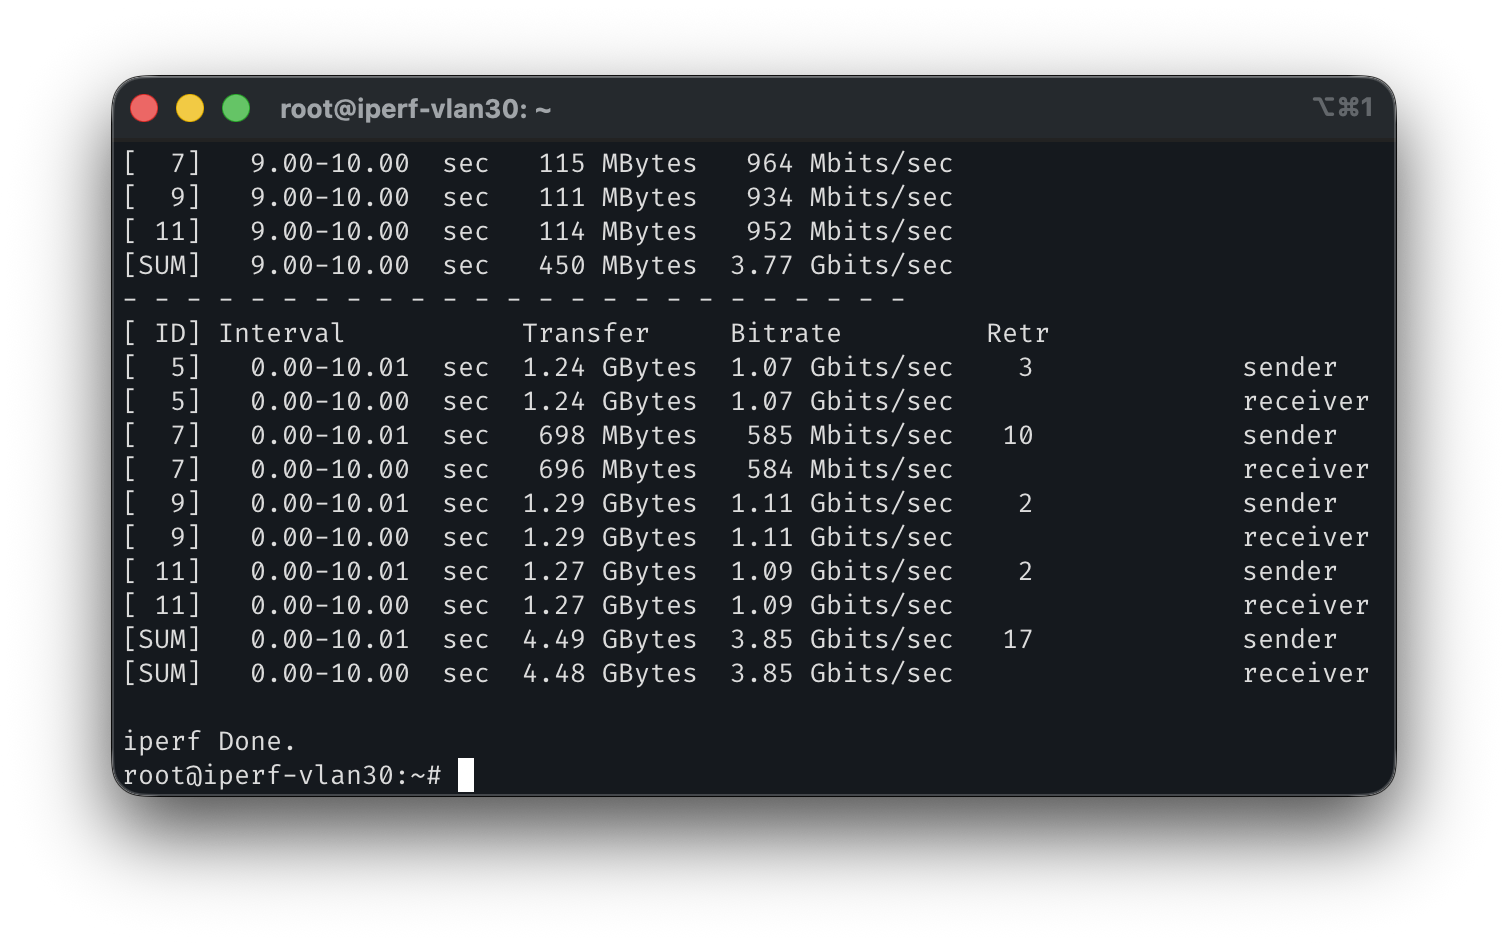
UL SPEED
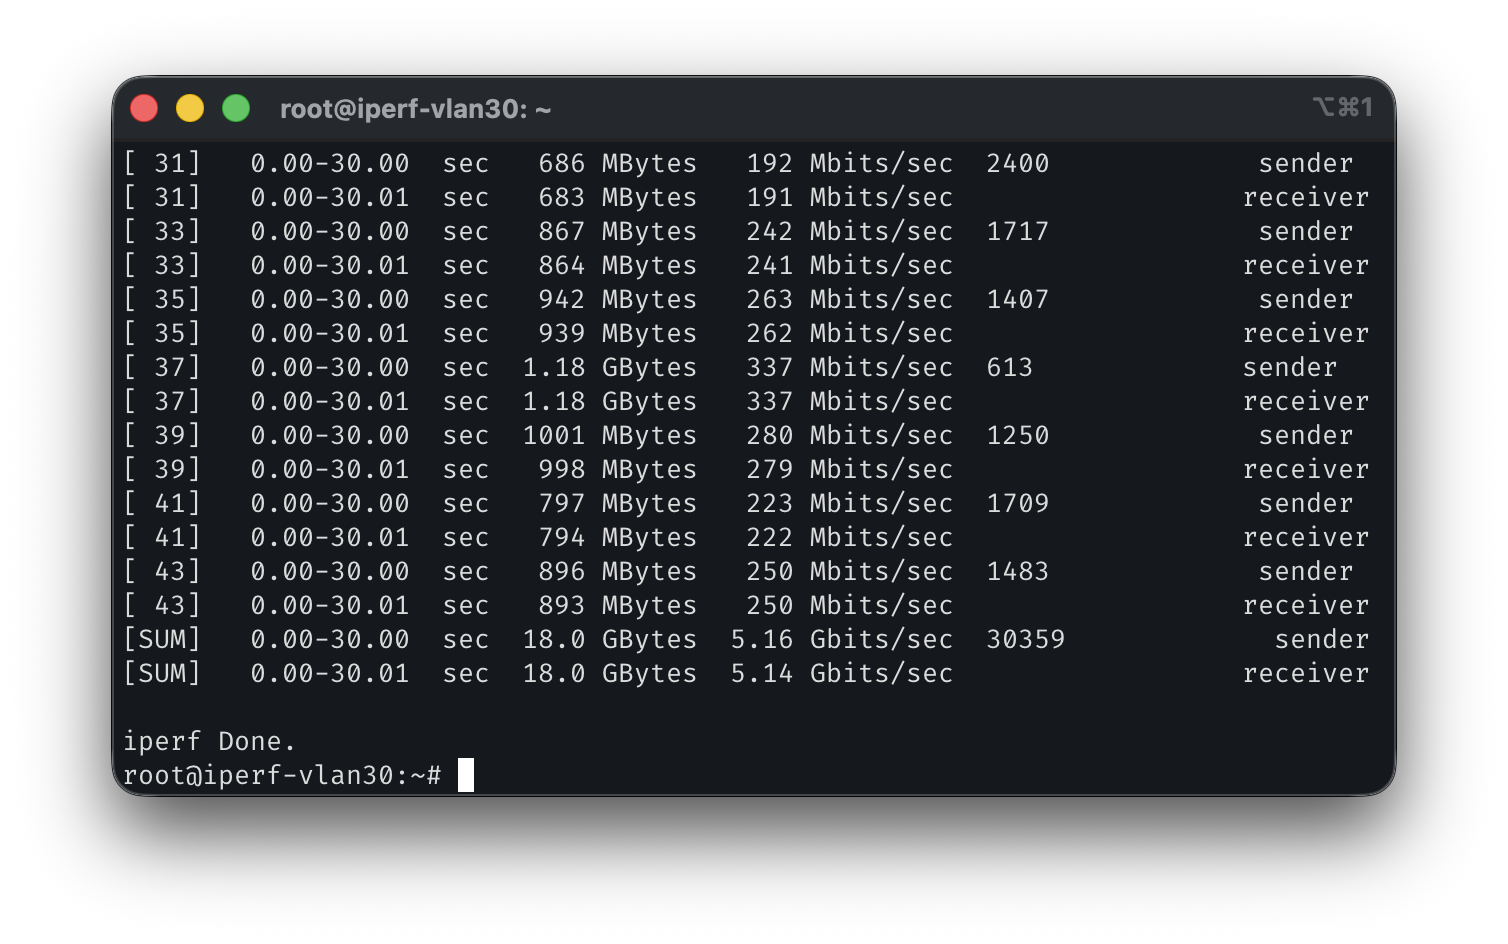
I may not be getting the full 10G bandwidth, but I’m certainly getting ~5x the speed compared to my previous connection for the same price.
What’s next
In addition to the benefits a multi-gigabit upstream brings, being assigned an IPv6 subnet from my ISP will allow me to host multiple services from within my local network since the hosts will now have publicly routable addresses. This means a few things:
- No need to keep track and configure ports for port-forwarding to different VMs or containers.
- Multiple services can be hosted on the same port.
- I can create a DMZ network to completely expose hosts to the public internet.
- P2P connectivity can be established without the requirement of NAT-ing.