Before I started working on spinning up my 3-node K3s cluster, I was under the impression that Traefik would be one of the easiest to migrate from my docker setup since it already had some kind of native integration with Kubernetes in terms of available custom resources. Unfortunately this wasn’t the case as with my personal experience. Reading through the custom values yaml file and referring to the available documentation to figure out how the docker configuration compares to when deploying in K8s wasn’t as straightforward as I expected. The part where I took time the most was when I was working on setting up automatic TLS certificate provisioning for the backend services I was running.
I got everything working eventually after multiple iterations of trial and error, and upgrading my traefik helm release countless times. And after finding this Traefik blog post where they explain how it all actually works and can be configured. At this point I’ve migrated all of my docker applications into my k8s cluster, and reading through the Traefik documentation again, it just makes a lot more sense now.
I guess the most important bit of the documentation is the part where they mentioned the requirement of using Cert-manager when using Traefik Proxy in Kubernetes. Quoting from the documentation:
LetsEncrypt Support with the Ingress Provider By design, Traefik is a stateless application, meaning that it only derives its configuration from the environment it runs in, without additional configuration. For this reason, users can run multiple instances of Traefik at the same time to achieve HA, as is a common pattern in the kubernetes ecosystem. When using a single instance of Traefik Proxy with Let’s Encrypt, you should encounter no issues. However, this could be a single point of failure. Unfortunately, it is not possible to run multiple instances of Traefik 2.0 with Let’s Encrypt enabled, because there is no way to ensure that the correct instance of Traefik receives the challenge request, and subsequent responses. Previous versions of Traefik used a KV store to attempt to achieve this, but due to sub-optimal performance that feature was dropped in 2.0. If you need Let’s Encrypt with high availability in a Kubernetes environment, we recommend using Traefik Enterprise which includes distributed Let’s Encrypt as a supported feature. If you want to keep using Traefik Proxy, LetsEncrypt HA can be achieved by using a Certificate Controller such as Cert-Manager. When using Cert-Manager to manage certificates, it creates secrets in your namespaces that can be referenced as TLS secrets in your ingress objects.
Since we are working in K8s, almost everything you can think of can be abstracted. For this instance, the TLS configuration is abstracted from the helm custom values yaml file and instead can be pegged to an Ingress resource when using Cert-manager.
To summarize in a few lines:
- Install Traefik so it can act your Ingress controller.
- Install Cert-manager so it can monitor your Ingress resources, and based on the TLS configuration and with some annotations, it will automatically initiate the DNS challenge, create the TLS certificates sand save them as a secret in the application namespace.
- Create Ingress resources to access your backend servcies while at the same time terminate HTTPS traffic (with Traefik).

Do note that while Traefik is an ingress controller and comes with its own IngressRoute CRD, it cannot be used together with Cert-manager at the moment. In this case we have to use the default Kubernetes Ingress resource.
In this post I will show how I configured Traefik and Cert-manager (patterned to the Traefik blog post!) to be used with Cloudflare. I will also show how you can have another layer of security by having multiple entry points and explicitly defining one during the ingress configuration. Though before proceeding, do note that I assume you already have an idea how to configure dynamic DNS and port-forwarding on Cloudflare and on your router.
Traefik
Recently I’ve started using ArgoCD for managing all my applications including those that are installed via helm charts. For now we will install Traefik using helm.
helm repo add traefik https://traefik.github.io/charts # Add the Traefik repository
helm repo update # Update the repositories
helm show values traefik/traefik > values.yaml # Download the custom values yaml
I would recommend you to browse through the custom values yaml file to get familiarized with the available configuration and other features of Traefik. If you want to get started quickly then you can follow the below yaml configuration:
values.yaml
deployment:
  enabled: true
  kind: Deployment
  replicas: 1
  terminationGracePeriodSeconds: 60
  minReadySeconds: 0

ingressRoute:
  dashboard:
    enabled: true
    matchRule: Host(`traefik.yownowndomain.com`) && PathPrefix(`/dashboard`) || Host(`traefik.yownowndomain.com`) && PathPrefix(`/api`)
    entryPoints: ["traefik","websecure"]

additionalArguments:
  - "--serversTransport.insecureSkipVerify=true"
  - "--providers.kubernetesingress.ingressendpoint.publishedservice=traefik/traefik"

ports:
  traefik:
    port: 9000
    expose: true
    exposedPort: 9000
    protocol: TCP
  web:
    port: 80
    expose: true
    exposedPort: 80
    protocol: TCP
    redirectTo: websecure
  webext:
    port: 8080
    expose: true
    exposedPort: 8080
    protocol: TCP
    redirectTo: websecureexternal
  websecure:
    port: 443
    expose: true
    exposedPort: 443
    protocol: TCP
    http3:
      enabled: false
    tls:
      enabled: true
      options: ""
      certResolver: ""
    middlewares:
      - default-default@kubernetescrd
  websecureext:
    port: 8443
    expose: true
    exposedPort: 8443
    protocol: TCP
    http3:
      enabled: false
    tls:
      enabled: true
      options: ""
      certResolver: ""
    middlewares:
      - default-default@kubernetescrd
  metrics:
    port: 9100
    expose: false
    exposedPort: 9100
    protocol: TCP
  dnsovertls:
    port: 8853
    expose: true
    exposedPort: 853
    protocol: TCP
    tls:
      enabled: false
    middlewares:
      - default-default@kubernetescrd
tlsOptions:
  default:
    minVersion: VersionTLS12
    cipherSuites:
      - TLS_ECDHE_ECDSA_WITH_AES_128_GCM_SHA256
      - TLS_ECDHE_RSA_WITH_AES_128_GCM_SHA256
      - TLS_ECDHE_ECDSA_WITH_AES_256_GCM_SHA384
      - TLS_ECDHE_RSA_WITH_AES_256_GCM_SHA384
      - TLS_ECDHE_ECDSA_WITH_CHACHA20_POLY1305
      - TLS_ECDHE_RSA_WITH_CHACHA20_POLY1305

service:
  enabled: true
  single: true
  type: LoadBalancer
  annotations:
    io.cilium/lb-ipam-ips: 10.80.0.2
  labels:
    exposedExternal: "yes"
In my custom yaml file notice that I have four different entryPoints defined. I configured it like this to have separate incoming streams between my internal-only applications against the internet-exposed ones. Having a common entryPoint for both internal and externally exposed applications is a security flaw since hackers might still be able to access your internal-only apps if they guessed the sub-domain and locally configured CNAME forwarding (they don’t need access to your DNS configuration).
Once your custom values yaml file is ready. Hit up the helm install command and proceed to the next step to create a Middleware resource.
default-middleware.yaml
apiVersion: traefik.io/v1alpha1
kind: Middleware
metadata:
  name: traefik
spec:
  headers:
    customResponseHeaders:
      X-Robots-Tag: "none,noarchive,nosnippet,notranslate,noimageindex"
      X-Forwarded-Proto: "https"
      server: ""
    customRequestHeaders:
      X-Forwarded-Proto: "https"
    sslProxyHeaders:
      X-Forwarded-Proto: "https"
    referrerPolicy: "same-origin"
    hostsProxyHeaders:
      - "X-Forwarded-Host"
    contentTypeNosniff: true
    browserXssFilter: true
    forceSTSHeader: true
    stsIncludeSubdomains: true
    stsSeconds: 63072000
    stsPreload: true
helm install traefik/traefik -f values.yaml
kubectl apply -f default-middleware.yaml
Now that you have Traefik up and running, expose the webext and websecureext entryPoints on your router. Simply port-forward 80 to 8080, and 443 to 8443.
Cloudflare
Going to Cloudflare, you have to configure an access token to be used later on when configuring Cert-manager. Login to your Cloudflare account. Navigate to My Profile > API Tokens > Create Token.
Under Permissions, set Zone - DNS - Edit
Under Zone Resources, set Include - Specific zone - “yourowndomain.com”
E.g.
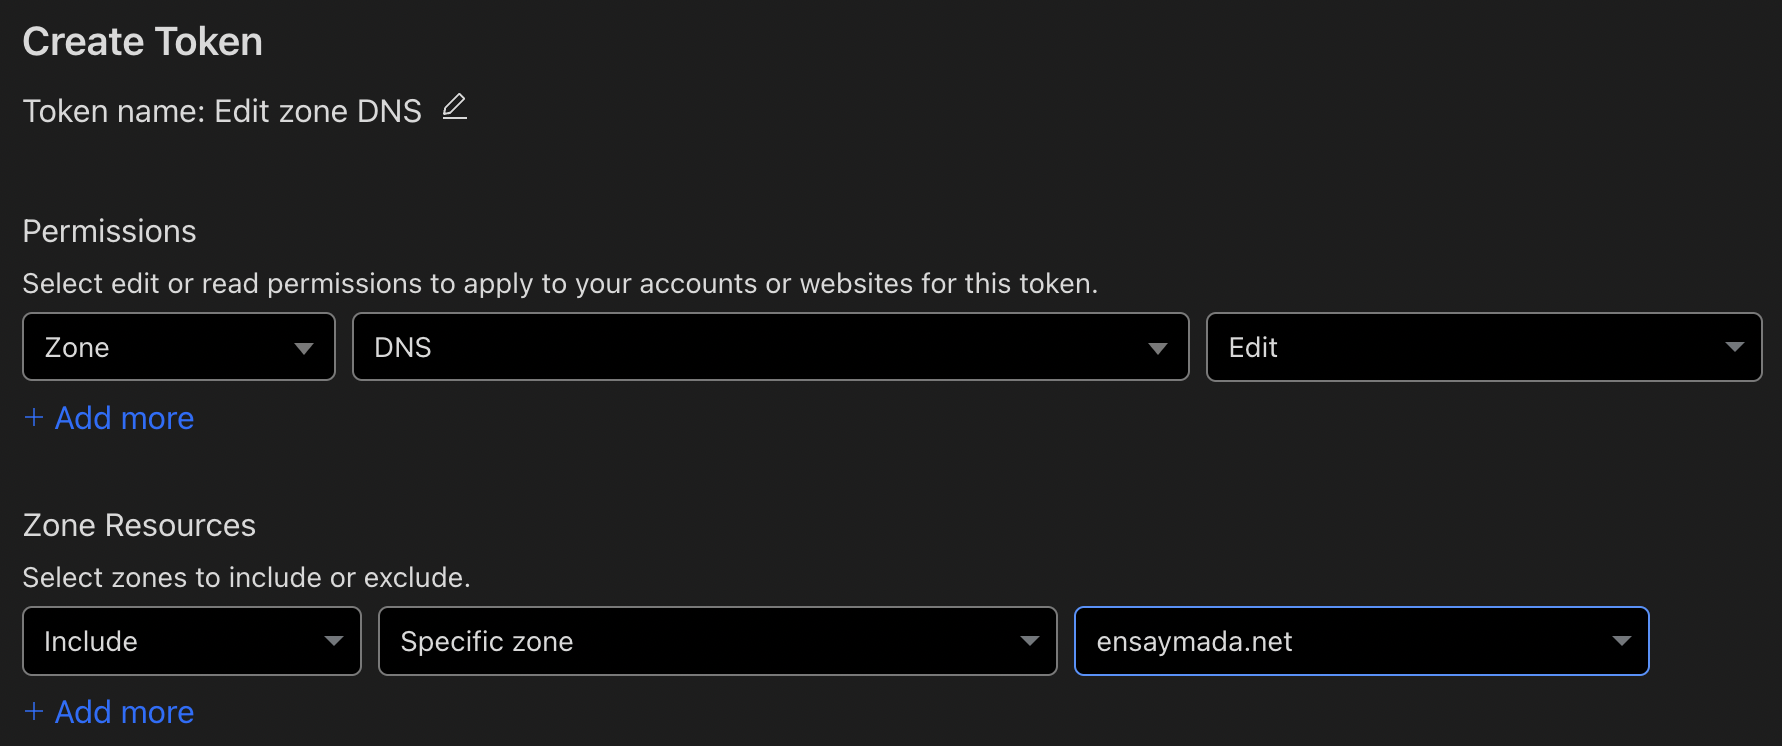
Create and save your token somewhere safe.
Cert-manager
Cert-manager can be installed using helm. Quoting from the official documentation, Cert-Manager together with the CRDs can be installed with the following commands:
helm repo add jetstack https://charts.jetstack.io
helm repo update
helm install \
  cert-manager jetstack/cert-manager \
  --namespace cert-manager \
  --create-namespace \
  --version v1.13.2 \
  --set installCRDs=true
After installation, it’s time to configure cert-manager for use with Cloudflare. You simply just have to create a secret containing your cloudflare email and API token:
cloudflare-api-token-secret.yaml
apiVersion: v1
kind: Secret
metadata:
  name: cloudflare-api-token
  namespace: cert-manager
type: Opaque
stringData:
  email: [email protected]
  apiToken: AbcD321eFg456_
Next is to create a ClusterIssuer resource. This is one of the CRDs that will come with cert-manager. Here you have to specify your email to be used with Let’s Encrypt as well as the secret you created in the previous step.
clusterissuer.yaml
apiVersion: cert-manager.io/v1
kind: ClusterIssuer
metadata:
  name: letsencrypt-cluster-issuer
  namespace: cert-manager
spec:
  acme:
    email: [email protected]
    # Prod
    server: https://acme-v02.api.letsencrypt.org/directory
    # We use the staging server here for testing to avoid hitting
#    server: https://acme-staging-v02.api.letsencrypt.org/directory
    privateKeySecretRef:
      # if not existing, it will register a new account and stores it
      name: letsencrypt-acc-key
    solvers:
      - dns01:
      # The ingressClass used to create the necessary ingress routes
          cloudflare:
            email: [email protected]
            apiTokenSecretRef:
              name: cloudflare-api-token
              key: apiToken
        selector:
          dnsZones:
            - 'yourowndomain.com'
If you are doing this the first time, I strongly suggest you first use the staging server of Let’s Encrypt and ensure certificate issuance works fine. To switch to the porduction server all you have to do is just re-create the resource and point to the new URL. Do note in the example above, the resource is pointing to the production server.
Exposing your application
To test this we create a simple nginx deployment that is exposed within the cluster and an ingress resource.
nginx.yaml
apiVersion: apps/v1
kind: Deployment
metadata:
  name: nginx-deployment
  labels:
    app: nginx
spec:
  selector:
    matchLabels:
      app: nginx
  replicas: 1
  template:
    metadata:
      labels:
        app: nginx
    spec:
      containers:
      - name: nginx
        image: nginx:latest
        ports:
        - containerPort: 80
---
apiVersion: v1
kind: Service
metadata:
  annotations:
  labels:
  name: nginx
spec:
  selector:
    app: nginx
  ports:
    - name: "http"
      port: 80
      targetPort: 80
  type: ClusterIP
When creating the ingress manifest, you have to ensure that you have the annotation: cert-manager.io/cluster-issuer: "letsencrypt-cluster-issuer".
Apart from this if you want your application to be accessed from a specific traefik entryPoint, then you need to explicitly mention this as another annotation. By default the ingress will be allowed from any entryPoint if you don’t specify this. In the below example manifest, I am keeping this annotation commented out so I can access my Nginx app from both internal and external entryPoints.
nginx-ingress.yaml
apiVersion: networking.k8s.io/v1
kind: Ingress
metadata:
  name: nginx
  annotations:
    cert-manager.io/cluster-issuer: "letsencrypt-cluster-issuer"
    # traefik.ingress.kubernetes.io/router.entrypoints: websecureext
spec:
  tls:
    - hosts:
        - nginx.yownowndomain.com
      secretName: tls-nginx-ingress
  rules:
    - host: nginx.yownowndomain.com
      http:
        paths:
          - path: /
            pathType: Prefix
            backend:
              service:
                name: nginx
                port:
                  number: 80
Once you apply these manifests, simply do a kubectl get certificate. This will show that a new certificate and secret resource got automatically created.
kubectl get certificate
NAME                READY   SECRET              AGE
tls-nginx-ingress   False   tls-nginx-ingress   61s
Wait for a few minutes. You should see that cerficicate ready status should be set to True.
You can also describe this certificate to see the events.
Events:
  Type    Reason     Age   From                                       Message
  ----    ------     ----  ----                                       -------
  Normal  Issuing    91s   cert-manager-certificates-trigger          Issuing certificate as Secret does not exist
  Normal  Generated  90s   cert-manager-certificates-key-manager      Stored new private key in temporary Secret resource "tls-nginx-ingress-2mvlp"
  Normal  Requested  90s   cert-manager-certificates-request-manager  Created new CertificateRequest resource "tls-nginx-ingress-1"
  Normal  Issuing    11s   cert-manager-certificates-issuing          The certificate has been successfully issued
To expose this on the internet, you will have to go back to Cloudflare and configure a CNAME forwarding to the sub-domain that points to your router’s external IP, given that you have already configured dynamic DNS.
You can also test this by configuring a CNAME entry on your local network’s DNS.
Once you ge this working you should be able to see a valid certificate when you access your nginx page.
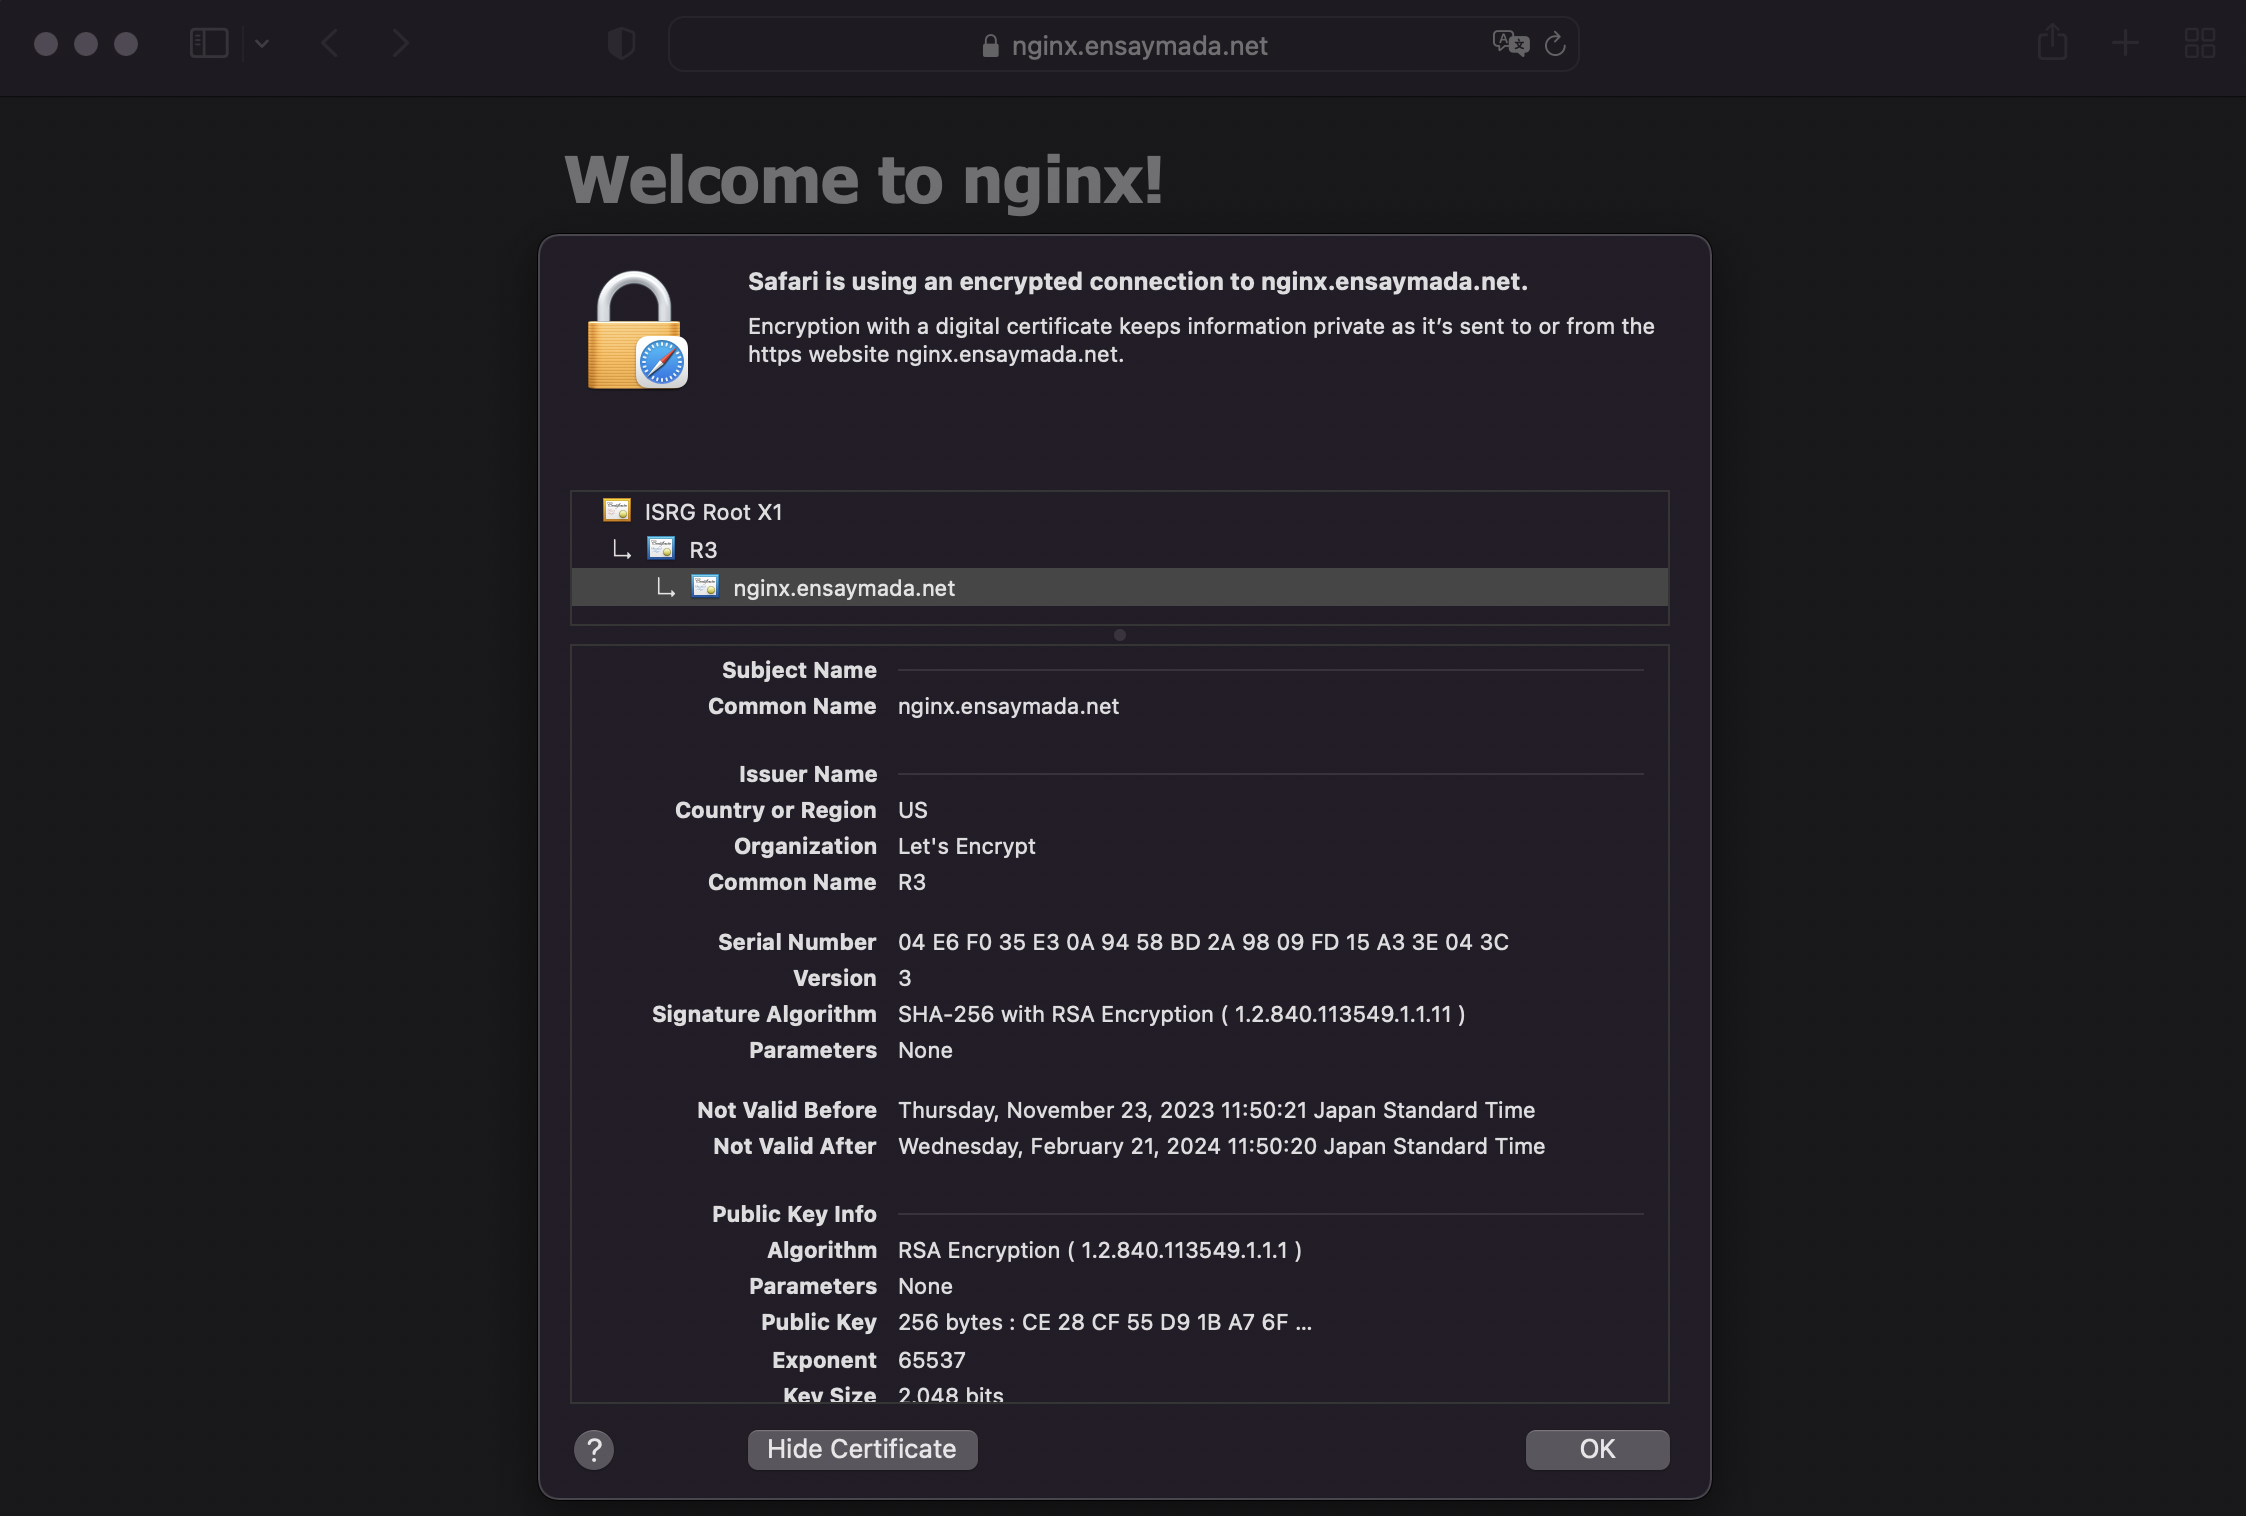
The certificate will have a validity of 3 months but you don’t have to worry since Cert-manager will renew this automatically.