In relation to my previous post where I mentioned that I will be starting a new journey learning IaC or Infrastructure-as-Code, today I am very happy to record this milestone of finally achieving a stable kubernetes cluster created with the help of Ansible and Terraform.
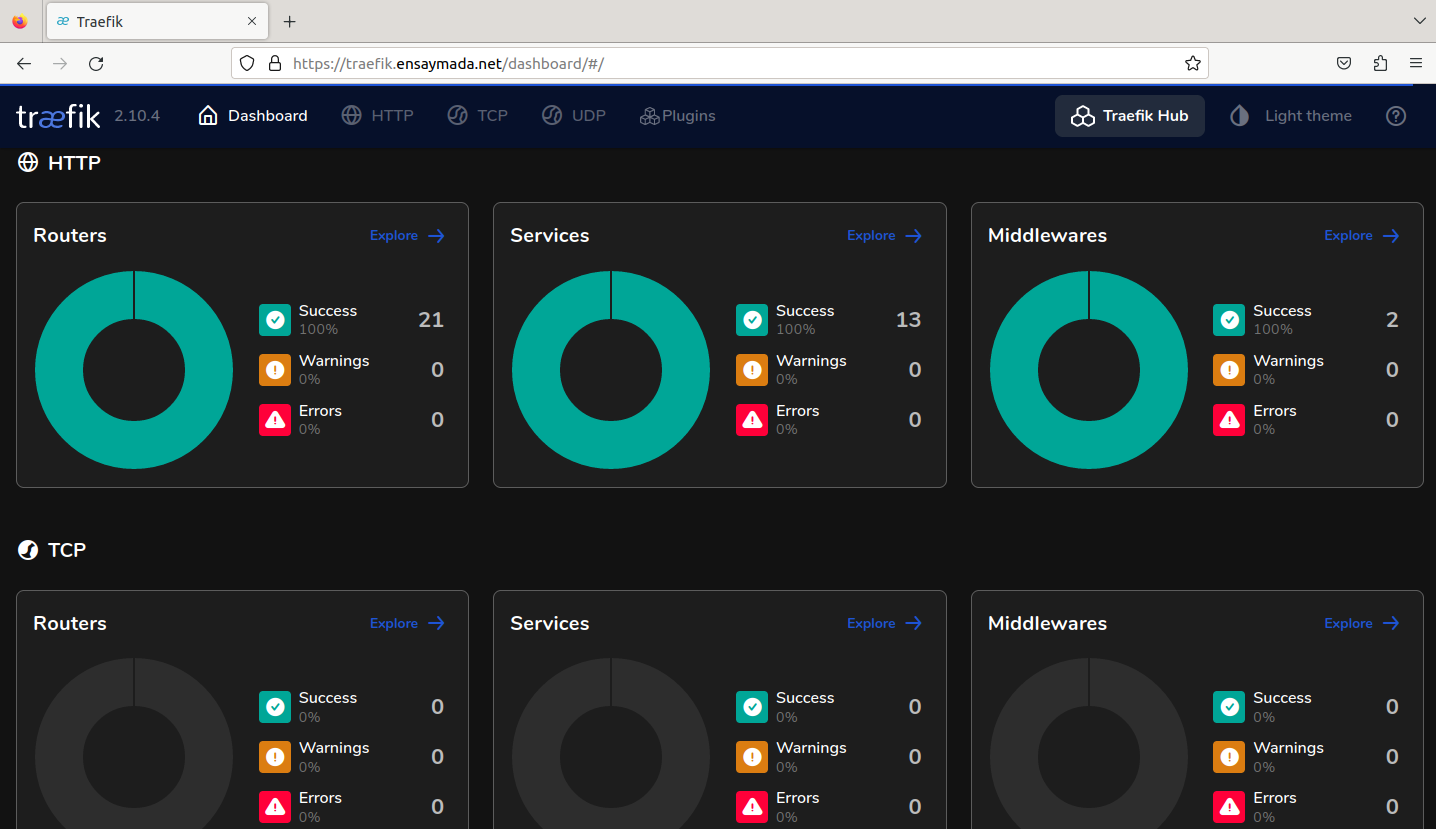
At this time of writing, so far only two services have been migrated from the docker environment into the new K8S cluster. That is my DNS which is also replaced now by AdguardHome (sorry Pihole!), and Traefik, which terminates all external HTTP communication incoming to my Homelab. And for the rest of the other services, those will be migrated in the coming weeks. For now what is important is I have HTTPS running perfectly fine with valid CA certificates even with dockerized services in the backend.
I also want to note here that during the learning process, whatever services that were running in the docker setup, all of those were nearly untouched since I was working inside a staging environment, keeping rigorous activities of countless create-delete of resources in isolation from my home production network.
That said, I received zero complaints from the wife except for the time I lost connectivity to the cluster when I thought everything was already stable. Lol more on this later.
In summary below opensource tools have been used for this project.
- Proxmox - Hypervisor (installed in 3 devices)
- Terraform - VM instantiation
- Ansible - VM configuration, Kubernetes installation
- K3s - Kubernetes platform
- Kube-vip - LB for Kube API
- Longhorn - Block storage
- Cilium - CNI
- Traefik - Reverse Proxy
- Cert-manager - SSL certificate manager
Terraform and Ansible play the major role of orchestrators allowing for quick creation and deletion of virtual resources putting Infrascture-as-Code into practice. The rest are supplementary to learning IaC.
Side node: Unfortunately Terraform will be transitioning away from a completely opensource license and soon will be sitting behind a BSL. It might be a good idea to switch to OpenTF (or OpenTofu) which is a fork of Terraform and now officially a CNCF project as well.
The setup
All development activities were done in a staging environment. This is where the unaccounted events of VM creation-deletion have transpired from testing out the Terraform scripts until the very end when installing Longhorn and Cilium with Ansible, and even when playing around with Traefik in K8s.
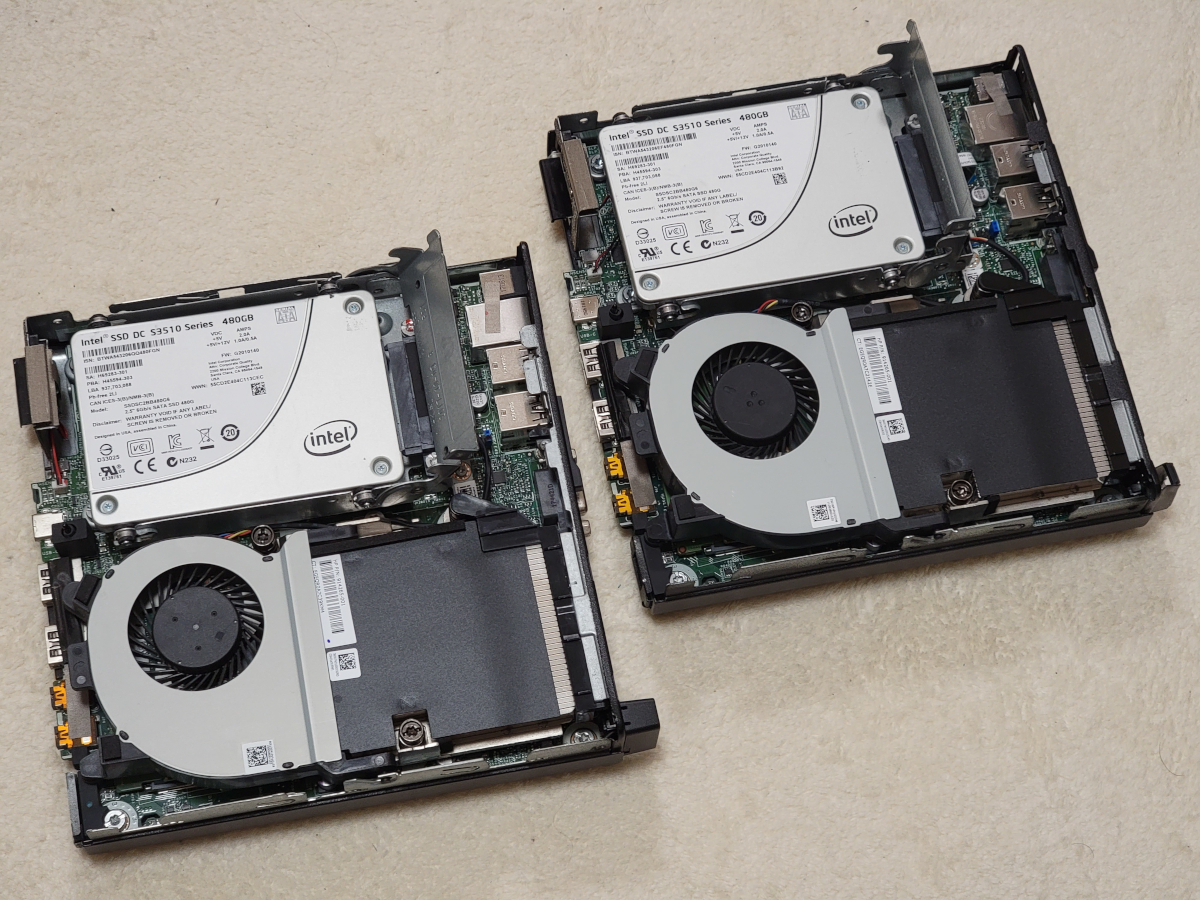
The staging environment was deployed on my Unraid box and as for the production build, I am using Tiny PCs that house a total of 32GB RAM each allowing more room for other VMs that I might need in the long run. To give a glimpse of the production HW:
| PVE host | CPU | Memory | Disk |
|---|---|---|---|
| PVE1 | 6 | 32GB | 512GB |
| PVE2 | 4 | 32GB | 480GB |
| PVE3 | 4 | 32GB | 480GB |

I was also able to source data center-grade Intel S3510 SSD drives from the second-hand market. These should help in the reliability department of these nodes that will be running data replication because of Longhorn. Currently, these are housed in 2 of 3 nodes. Still looking to get another one and pop it in PVE1.
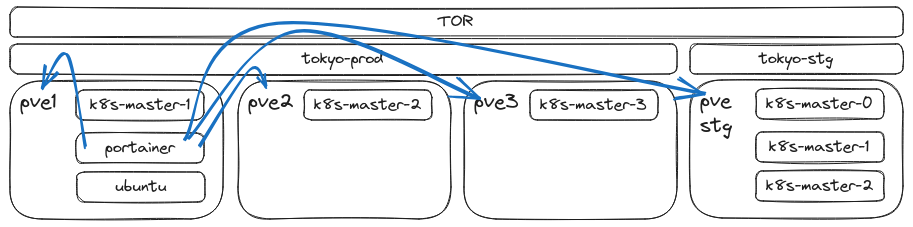
One container to rule them all
Both the Terraform and Ansible controllers are running from a LXC container deployed on PVE1. This is where I do all of the development work. I am running a docker instance of VS code on the same container which enables me to create and modify code easily. The same container is used to communicate with the production environment.
One of the best advantages of using an LXC container is that it’s so lightweight you can easily backup the environment anytime. I confirm Terraform and Ansible works well with the Ubuntu 22.04 template that comes with Proxmox.
Terraform and Ansible
Learning Terraform wasn’t so bad. The Proxmox provider documentation from Telmate is enough to get you started and with the declarative style that is used to write Terraform language, it just makes the learning process a lot more easier to deal with. This is also the part where I had the least modifications and time spent the least.
Once I got the VMs up and working, next thing I worked on is Ansible. Now this is the part where I spent the biggest chunk of my time. I literally am unable to count the times I had to execute terraform destroy and terraform apply to re-create the VMs and test out my Asnbile playbooks. To be fair starting with Ansible wasn’t really hard. It was the amount of automation I wanted to go with that later on will prove useful. Though I have to admit the playbooks are rather simple and which others might find lacking in terms of best practices. But hey, I have to start from somewhere!
The five commands to have a complete working k3s cluster:
terraform apply
ansible-playbook -i inventory.yaml preflight.yaml
ansible-playbook -i inventory.yaml logical-volume-create.yaml
ansible-playbook -i inventory.yaml k3s-kubevip-helm-ciliumInstallHelmCli.yaml
ansible-playbook -i inventory.yaml longhorn-install.yaml
The whole process takes about more or less 15 minutes. Terraform creates 3 VMs, one on each proxmox node. Each VM is set 4 vCPU, 12GB RAM, 50GB boot disk + 200GB longhorn disk. preflight.yaml defines the ssh keys for passwordless authentication and installs the necessarry packages to run k3s-related software. logical-volume-create.yaml as its name suggests, creates the logical volume to be used for longhorn. k3s-kubevip-helm-ciliumInstallHelmCli.yaml installs k3s, kube-vip, helm, and Cilium altogether sequentially. And last but not the least, longhorn-install.yaml installs longhorn via helm.
Cilium
While Calico would be the go-to CNI for most, I opted to go for Cilium. The main reason for this is to start learning eBPF and have a grasp how things move within the kernel space. The installation was straightforward but to get it working in properly was a challenge.
I was able to make BGP control plane work during the initial phase and when I thought everything was already stable, I then started seeing BGP peers getting dropped and at some point even lost connectvivity to my DNS hosted in the cluster. After adding into the parameters one by one, I was able to make it work without disconnects.
helm install cilium cilium/cilium --version 1.14.2 \
--namespace kube-system \
--set bgpControlPlane.enabled=true \
--set tunnel=disabled \
--set ipam.operator.clusterPoolIPv4PodCIDRList=10.42.0.0/16 \
--set kubeProxyReplacement=true \
--set k8sServiceHost={{ _k8sServiceHost }} \
--set k8sServicePort=6443 \
--set routingMode=native \
--set autoDirectNodeRoutes=true \
--set ipv4NativeRoutingCIDR=10.42.0.0/16 \
--set loadBalancer.mode=dsr \
--set ipv4.enabled=true \
--set prometheus.enabled=true \
--set operator.prometheus.enabled=true \
--set hubble.enabled=true \
--set hubble.metrics.enabled="{dns,drop,tcp,flow,port-distribution,icmp,http}"
kubeProxyReplacement is enabled to make use of eBPF instead of the traditional way of iptables. loadBalancerMode is also set to DSR making it possible for nodes to respond directly to the sender, avoiding the need to go via the return path. routingMode set to native and autoDirectNodeRoutes is set to true since all nodes are connected via the same L2 network. You can read more on Cilium routing here. Prometheus and Hubble are also enabled so I can touch on them later once I get more time.
cilium-bgp-peering-policy.yaml:
apiVersion: "cilium.io/v2alpha1"
kind: CiliumBGPPeeringPolicy
metadata:
  name: 00-bgp-peering-policy
spec: # CiliumBGPPeeringPolicySpec
  nodeSelector:
    matchLabels:
      kubernetes.io/hostname: k8s-master-0-dev
  virtualRouters: # []CiliumBGPVirtualRouter
    - localASN: 65090
      exportPodCIDR: false
      serviceSelector:
        matchLabels:
          exposedExternal: "yes"
      neighbors: # []CiliumBGPNeighbor
        - peerAddress: '10.20.0.1/32'
          peerASN: 65000
          eBGPMultihopTTL: 10
          connectRetryTimeSeconds: 120
          holdTimeSeconds: 90
          keepAliveTimeSeconds: 30
          gracefulRestart:
            enabled: true
            restartTimeSeconds: 120
---
apiVersion: "cilium.io/v2alpha1"
kind: CiliumBGPPeeringPolicy
metadata:
  name: 01-bgp-peering-policy
spec: # CiliumBGPPeeringPolicySpec
  nodeSelector:
    matchLabels:
      kubernetes.io/hostname: k8s-master-1-dev
  virtualRouters: # []CiliumBGPVirtualRouter
    - localASN: 65091
      exportPodCIDR: false
      serviceSelector:
        matchLabels:
          exposedExternal: "yes"
      neighbors: # []CiliumBGPNeighbor
        - peerAddress: '10.20.0.1/32'
          peerASN: 65000
          eBGPMultihopTTL: 10
          connectRetryTimeSeconds: 120
          holdTimeSeconds: 90
          keepAliveTimeSeconds: 30
          gracefulRestart:
            enabled: true
            restartTimeSeconds: 120
---
apiVersion: "cilium.io/v2alpha1"
kind: CiliumBGPPeeringPolicy
metadata:
  name: 02-bgp-peering-policy
spec: # CiliumBGPPeeringPolicySpec
  nodeSelector:
    matchLabels:
      kubernetes.io/hostname: k8s-master-2-dev
  virtualRouters: # []CiliumBGPVirtualRouter
    - localASN: 65092
      exportPodCIDR: false
      serviceSelector:
        matchLabels:
          exposedExternal: "yes"
      neighbors: # []CiliumBGPNeighbor
        - peerAddress: '10.20.0.1/32'
          peerASN: 65000
          eBGPMultihopTTL: 10
          connectRetryTimeSeconds: 120
          holdTimeSeconds: 90
          keepAliveTimeSeconds: 30
          gracefulRestart:
            enabled: true
            restartTimeSeconds: 120
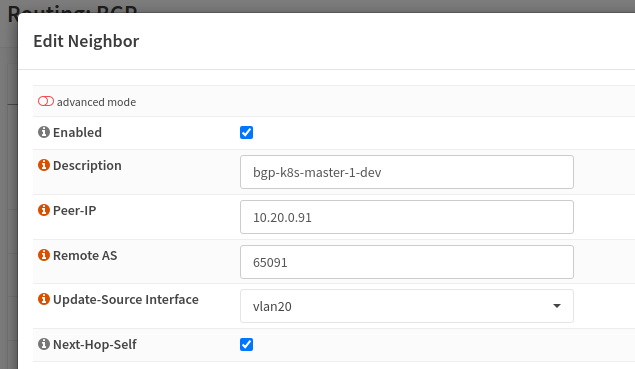
As for configuring BGP on OPNsense, all I had to do was download the os-frr plugin and apply the configuration according to the Cilium BGP resources.
Once BGP is configured, I then configured CiliumLoadBalancerIPPool and configured the serviceSelector there so any service with a matching label will be assigned an external IP.
apiVersion: cilium.io/v2alpha1
kind: CiliumLoadBalancerIPPool
metadata:
  name: externalpool
spec:
  cidrs:
    - cidr: 192.168.100.0/27
  disabled: false
  serviceSelector:
    matchLabels:
      exposedExternal: "yes"
To assign services with external IPs, all you have to do is ensure two things (third one is optional):
- The service should have a label matching what you defined in your
CiliumLoadBalancerIPPool. - The service should be of type
LoadBalancer. - For static external IP assignment, the service should have an annotation of
io.cilium/lb-ipam-ipsfollowed by the IP address.
apiVersion: v1
kind: Service
metadata:
  annotations:
    io.cilium/lb-ipam-ips: 192.168.100.7
  labels:
    exposedExternal: "yes"
  name: adguard-ui
  namespace: adguard
...
...
spec:
  type: LoadBalancer
...
...
When all of the above are applied, you should now see an external IP assigned to your service. e.g.
❯ k -n adguard get svc
NAME         TYPE           CLUSTER-IP      EXTERNAL-IP     PORT(S)        AGE
adguard      LoadBalancer   10.43.254.122   192.168.100.8   53:30176/UDP   27d
adguard-ui   LoadBalancer   10.43.38.101    192.168.100.7   80:32108/TCP   27d
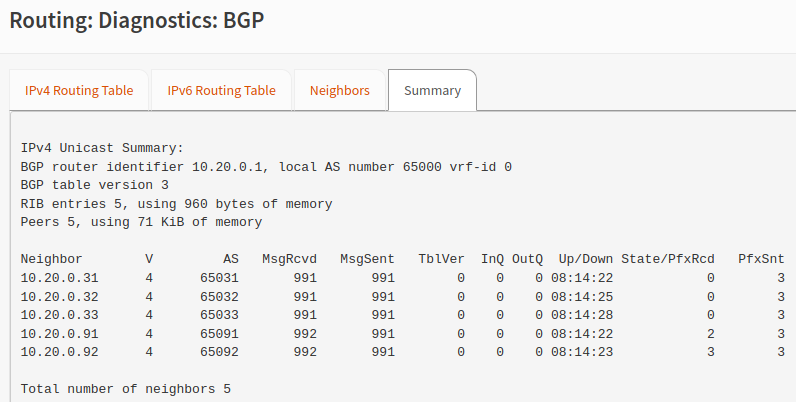
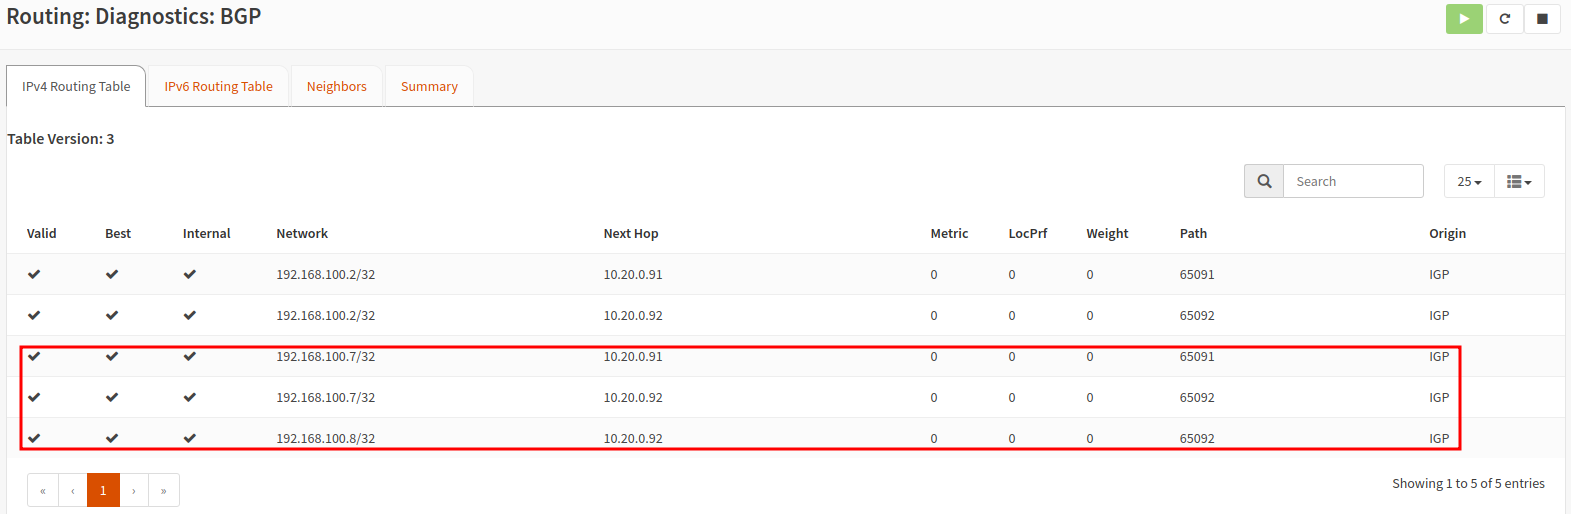
You should also be able to check the BGP peering status as well as the learned routes in OPNsense.
Longhorn
Before deciding to go for Longhorn, I was was trying to make Piraeus datastore work (FOSS version of Linstor storage for Kubernetes). I got it to work with ReadWriteOnce but the moment I tried to test ReadWriteMany(RWX), it just wouldn’t. On top of this it also felt that there was a steep learning curve to understand how Piraeus work on a deeper level in case I had to do extra troubleshooting in the future.
Longhorn on the other hand worked well out of the box. Testing out RWX by re-creating a pod on a different node worked well too and since Longhorn seems to use NFS to support this feature, accessing the volume from something external to the cluster e.g. from a VM works out of the box. The only thing is that there seems to be an open issue with Cilium when exposing the volume externally. When I try to mount the share to a VM, I do experience slowdowns when opening a file with vim or even when just browsing through the directories.
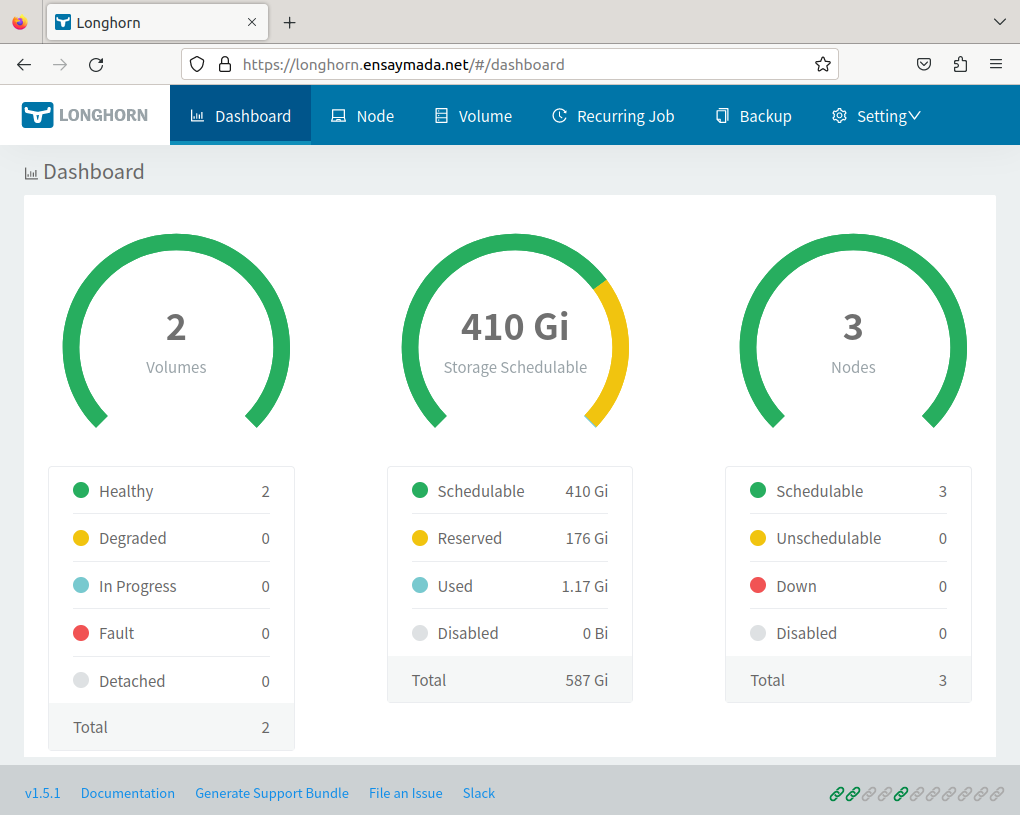
Longhorn makes use of a 200Gi second volume that was declared in the Terraform script. The above snapshot shows the amount of available volume.
For reference, below is the playbook task to install longhorn:
- name: install longhorn
  kubernetes.core.helm:
    name: longhorn
    chart_ref: longhorn/longhorn
    release_namespace: longhorn-system
    create_namespace: true
    update_repo_cache: true
    set_values:
      - value: service.ui.type=LoadBalancer
      - value: defaultSettings.defaultDataPath=/longhorn_vol
      - value: defaultSettings.defaultReplicaCount=3
Exposing services
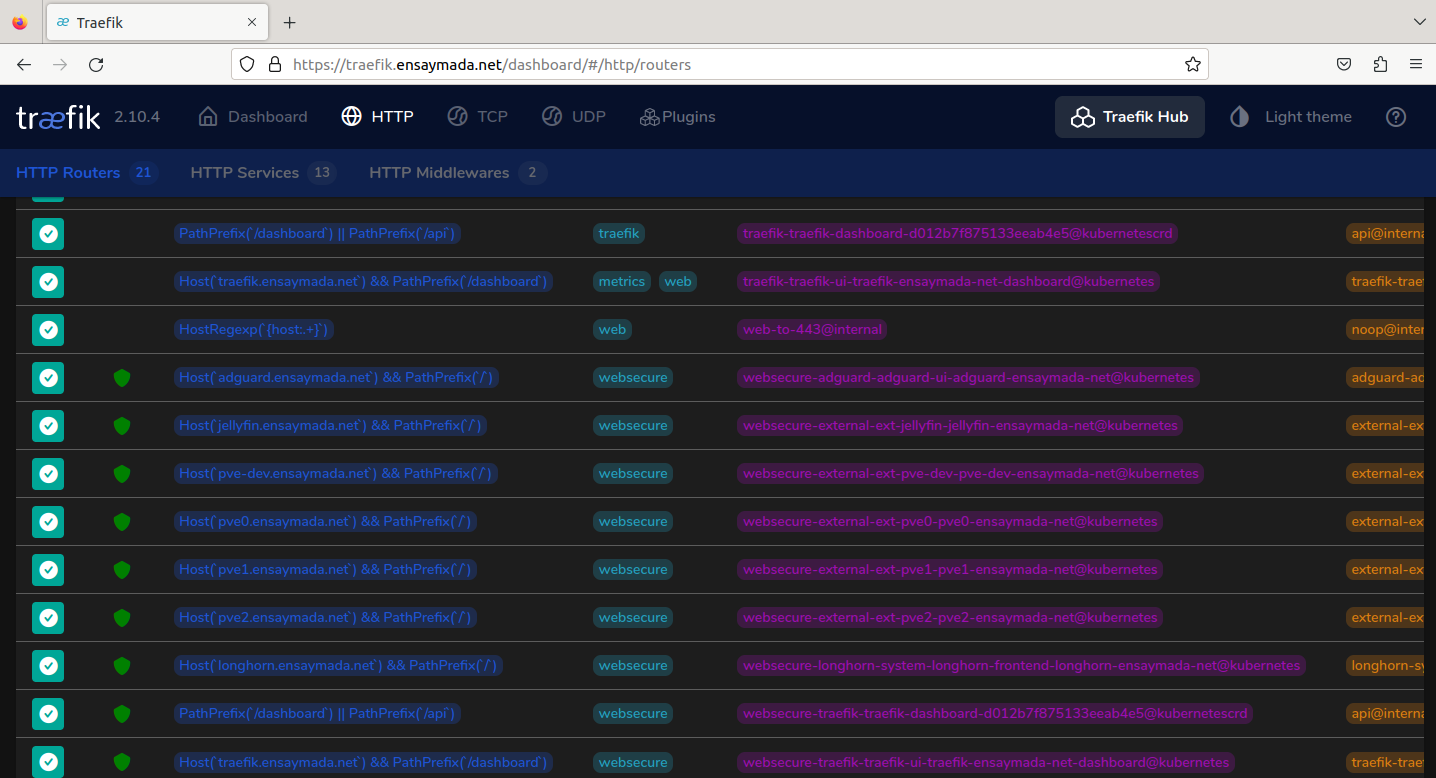
I took more time than expected when I was trying to expose the services with Traefik now running in Kubernetes. In the docker setup, the configuration was pretty straightforward with minimal reading required of the documentation. Whereas when running treafik in k8s, it came to the point that it already felt like I was digging my own grave with all the research and testing.
Eventually I got it to work by going with the base installation and slowly inching my way through the custom values in the yaml file. Once I got the middleware (for additional security headers) and TLS working via cert-manager, all I had to do was create individual ingress resources for each of the services I wanted to expose. The certificates are automatically created and managed by Cert-manager.
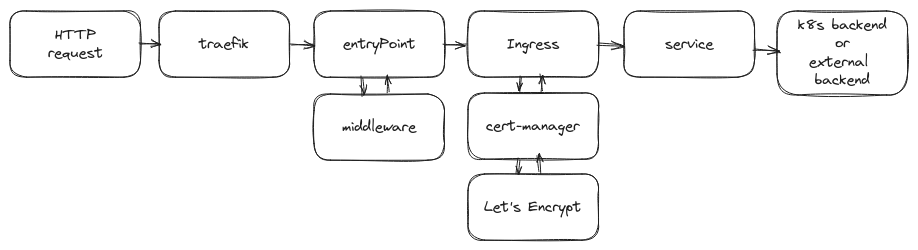
One thing to note, in Docker, the certificates can be managed by Traefik. But when using Traefik in a K8s environment, to make use of Let’s Encrypt, the only option is to use Cert-manager which can only be paired up with the default Kubernetes Ingress resource. Traefik’s Ingress CRD doesn’t support this at the moment.
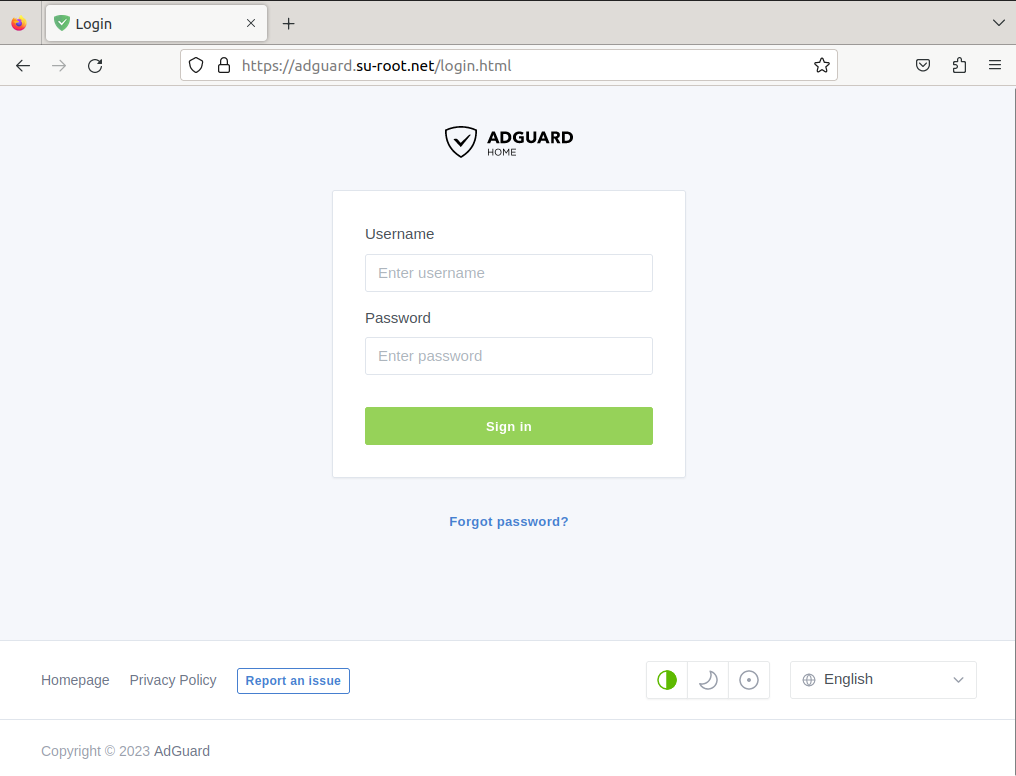
Below is a sample Ingress resource to reach the Adguard GUI from external to the cluster:
apiVersion: networking.k8s.io/v1
kind: Ingress
metadata:
 name: adguard-ui
 namespace: adguard
 annotations:
   cert-manager.io/cluster-issuer: "letsencrypt-cluster-issuer"
spec:
 tls:
   - hosts:
       - adguard.su-root.net
     secretName: tls-adguard-ui-ingress-dns
 rules:
   - host: adguard.su-root.net
     http:
       paths:
         - path: /
           pathType: Prefix
           backend:
             service:
               name: adguard-ui
               port:
                 number: 80
The journey continues
The learning doesn’t stop here. What I have achieved so far is a basic understanding of how IaC integrates and can be made to work in different environments depending on the requirement. Another good thing is that this adds up to my confidence knowingly I can spin up my cluster in a matter of minutes even in the event that I have to physically migrate to another environment.
Going further I will continue to enhance the Ansible playbooks and try to make use of industry best practices even if this is only intended for Homelab use. I’m also looking into integrating this with some kind of CICD tool like Jenkins or ArgoCD in the near future.
If you are interested to see more of this project, feel free to check out the repository over at my Github page. A disclaimer though, the README is not updated yet! I will be updating this sooner or later and together with that will try to explain in detail the idea behind each step of the installation process.