For this first post I want to start with the basic question — how do you reach your server at home with a dynamic public IP? I am almost sure that this is the most asked question when starting with self-hosting especially if you have the mindset of being able to access your environment anytime, anywhere. Well, at least for me, this is the very first question I had in mind when I was just starting back then.
For us who don’t want to pay more for a static IP, luckily there is a service called dynamic DNS. This is, for most of the time, free and should be supported by most modern home routers.
What is Dynamic DNS (DDNS)?
Let me explain this in layman’s terms. First, DNS stands for domain name service. A domain is the name you type when you want to access a website such as www.google.com or www.su-root.net. Domains will always be mapped to a public IP address as long as it’s registered.
Normally, a website will have a static public IP throughout its lifetime unless it is moved to a different server. For websites hosted by hosting companies such as AWS or Bluehost, the mapping of the IP address to a domain name is most of the time managed by them. This is as long as the domain provider is configured to use their nameservers.
For private hosts running behind a normal internet service provider, this is where DDNS comes into picture. If your ISP keeps changing your IP address (e.g. daily or weekly), then DDNS keeps track of this and updates their records automatically (as long as your router supports this feature). This is the best way for people who don’t want to acquire a static IP that incur additional costs on their monthly bill.
How do you configure Dynamic DNS?
Now let me walk you through how to configure it with the help of my home router. Before anything else you need to create an account from a DDNS provider such as no-ip.
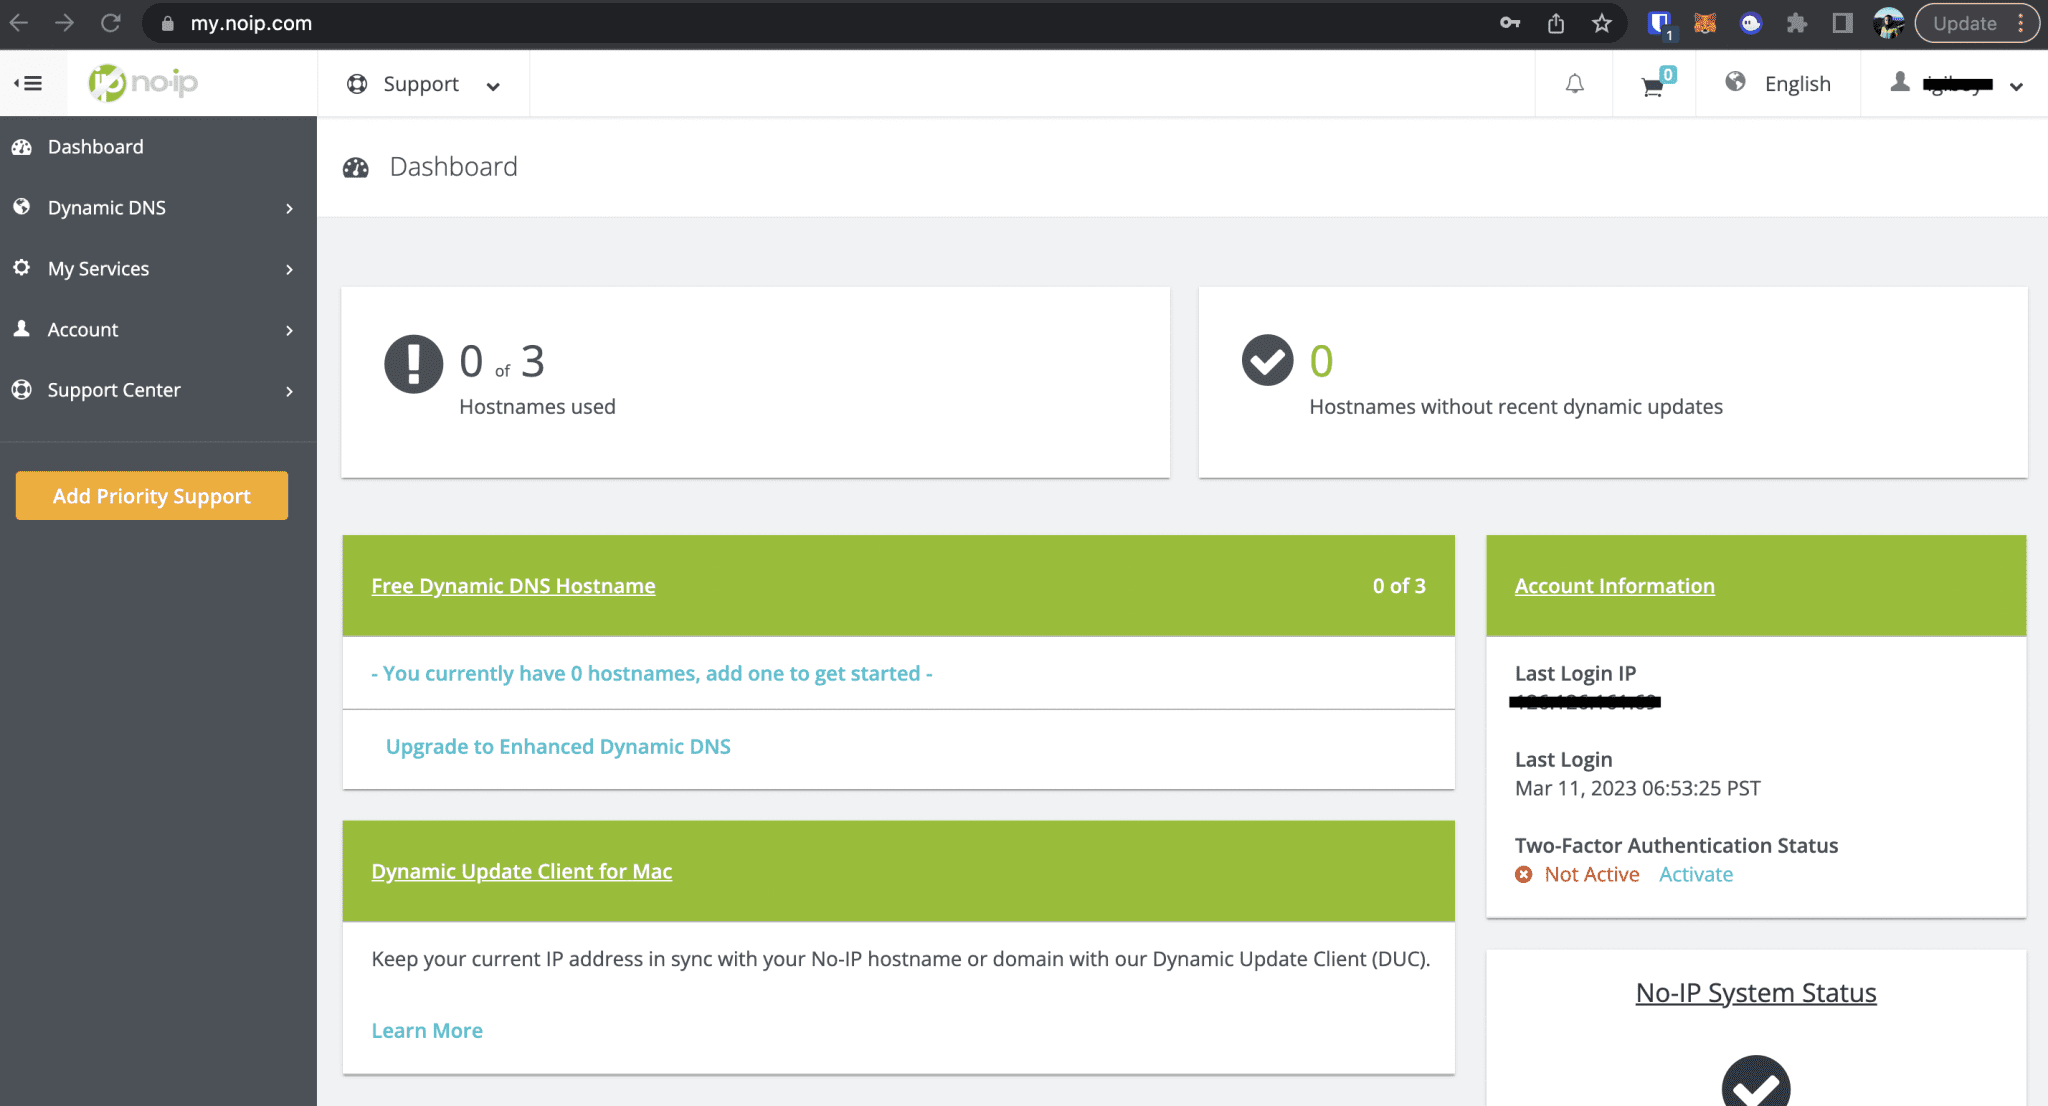
From the Dashboard, go to > Dynamic DNS > No-IP Hostnames then click Create Hostname.
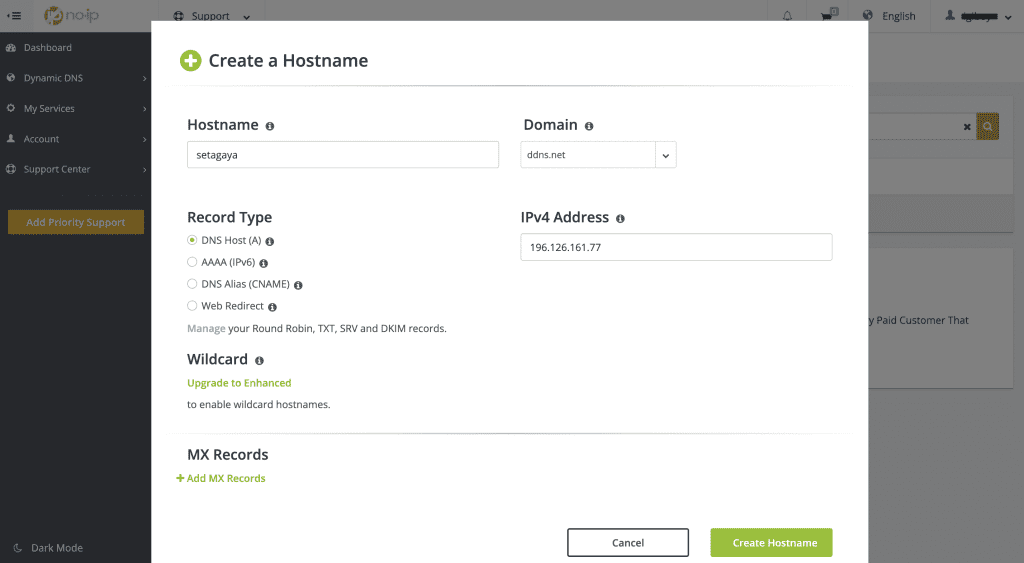
Input your preferred hostname and select any of the free domains. Keep Record Type as DNS Host (A), input your current public IP address, and proceed to create the hostname. You can check your IP here if you don’t know it yet.
Next is to configure the DDNS on the router.
What I have is a TP-Link Archer A10 from 3 years ago and it still works perfectly fine without any hiccup. Like I said, most modern routers should support DDNS, but if yours don’t and you plan to walk the path of self-hosting, then you can get a new or even a used one for just a couple of bucks.
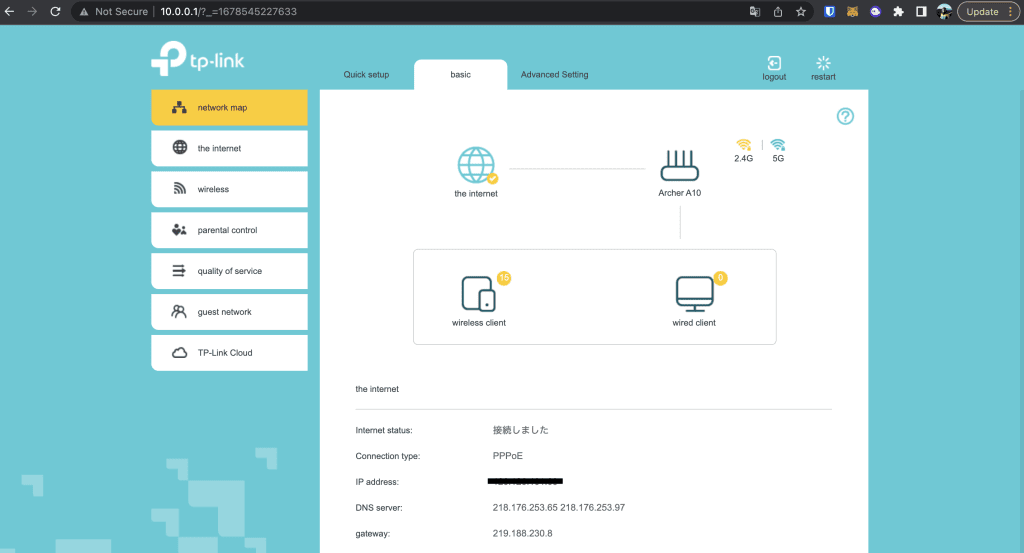
Login to your router’s web GUI. This is, for 99% of the time, the same as your default gateway IP. Mine happens to be “http://10.0.0.1”. You can also check your current WAN IP from here.
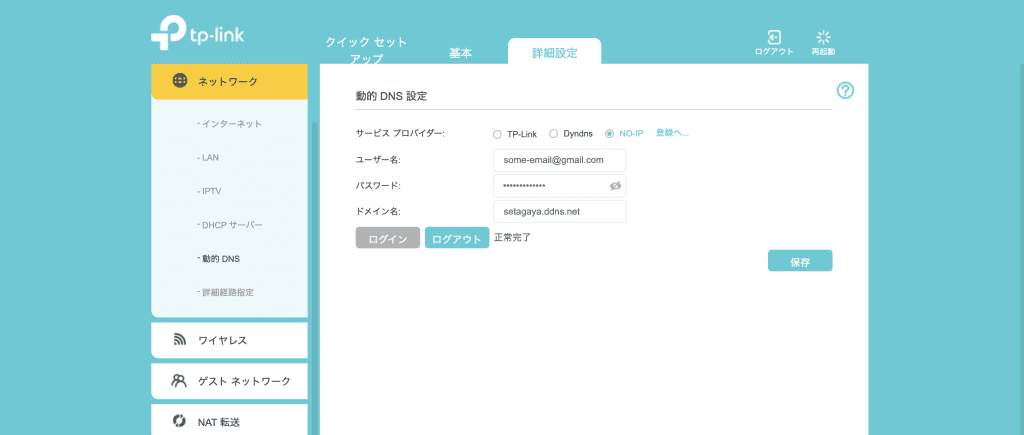
Next, go to the dynamic DNS configuration. In my case it’s under Advanced Settings > Network. Select NO-IP, input your credentials and the newly created domain. Save.
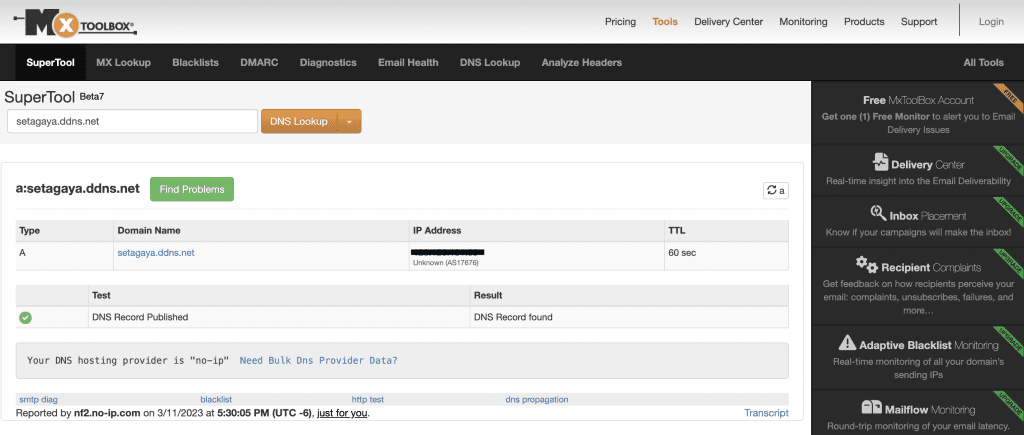
From here on your router will keep updating your DDNS (No-IP) every time your IP address changes. To verify if your configuration is working, you can do a DNS look up and check if it’s correctly mapped to your IP.
This is the first step to the path of self-hosting and once you have the services running on your server, then you can expose them later on by port forwarding which I will be covering in a different post.